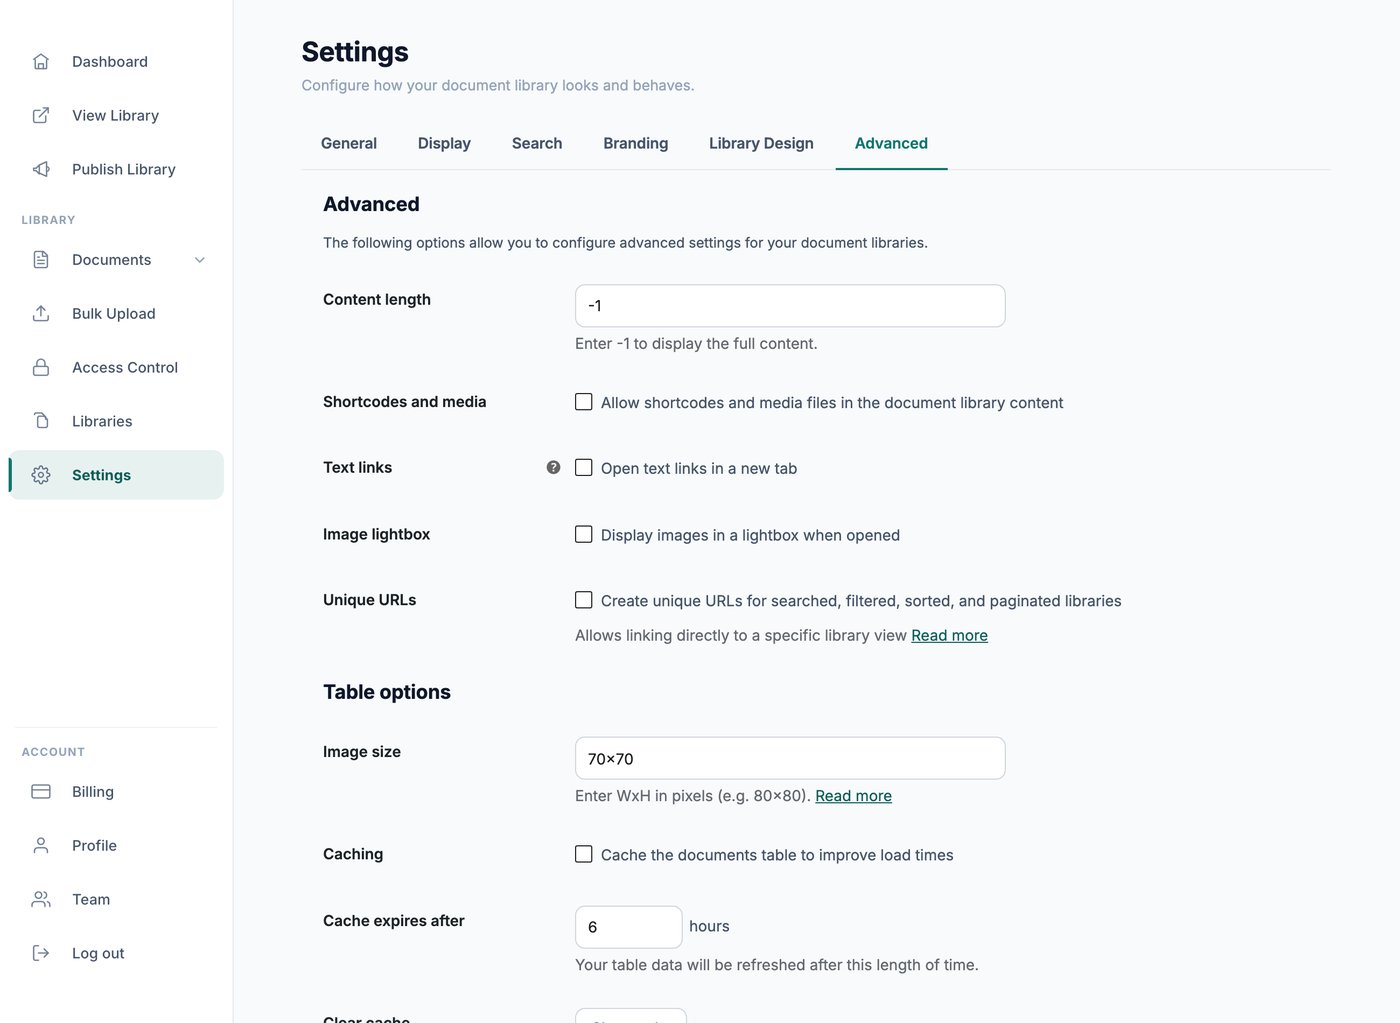





Document Library Pro hébergé propose deux mises en page, tableau and grille, and you have full control over which information appears about each document. You set this up visually in the Bibliothèque Builder when creating or editing a bibliothèque.
Champs disponibles
The fields you can display about each document depend on the layout you choose:
- Mise en page en tableau. ID, titre, contenu, extrait, image, date, modified date, document author, document catégories, document étiquettes, téléchargement count, fichier size, fichier type, fichiername, état and lien.
- Mise en page en grille. Titre, image, document author, document catégories, téléchargement count, fichier size, fichier type, fichiername and lien.
Choisir vos champs
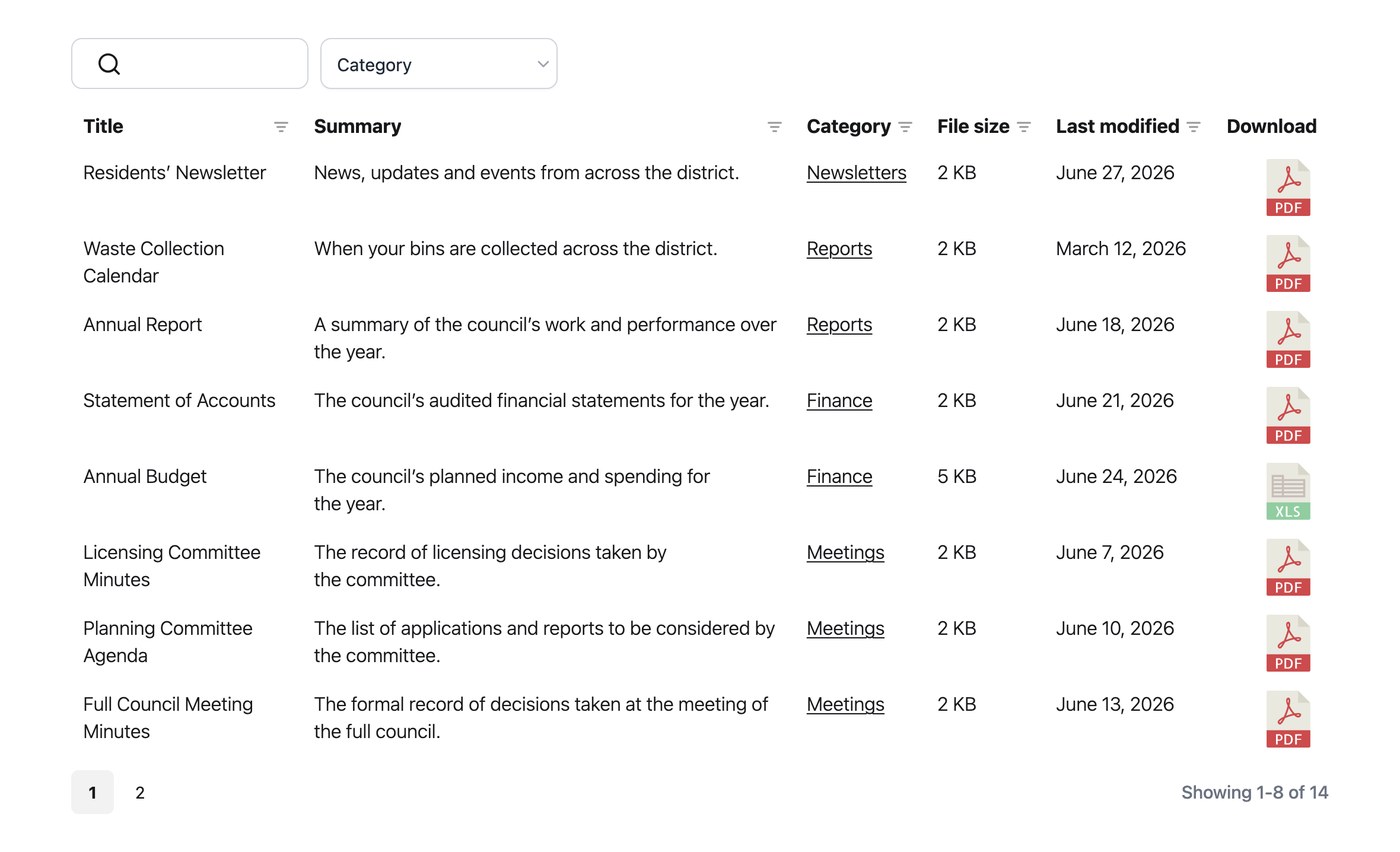
You choose which fields to display in the Bibliothèque Builder. The available controls depend on whether the bibliothèque uses the tableau or grille layout.
Mise en page en tableau
Utilisez the colonne builder to add and reorder your tableau colonnes. Click the pencil icon on a colonne to open its settings:
- Rename the colonne header label.
- Choisissez whether the colonne is clickable (for clickable colonne types only).
- Choisissez where the colonne liens to (for example, the téléchargement fichier).
- Réglages avancés :
- Masquer l’en-tête de colonne.
- Définir the colonne type to Text, Date or Number, which affects how the colonne se trie.
- Définir la largeur de la colonne.
- Définir the responsive visibility (which devices the colonne shows on).
- Définir the responsive priority (the order in which colonnes are hidden when there is not enough room).
Mise en page en grille
Tick the boxes to choose which fields appear in the grille. You can then configure them further:
- Champs cliquables. Choisissez which fields are clickable, in addition to the Document lien field, which is always clickable.
- Nombre de colonnes. Select between 1 and 4 colonnes.
- Titre du document et Nom du fichier. Choisissez whether clicking these téléchargements the fichier.
Détails des champs
Champs disponibles pour les deux mises en page
- Titre is the main document titre.
- Image shows the featured image (the document thumbnail). In the grille, it falls back to a fichier-type icon when no image is set.
- Auteur du document shows the name of the document author.
- Catégories de documents shows the catégories for each document, comma-separated where there is more than one.
- Lien contains a téléchargement lien and/or a preview lien.
- Nom du fichier shows the fichier name as plain text with no lien. It is for information only, so use one of the clickable fields for the actual téléchargement.
Champs disponibles uniquement pour la mise en page en tableau
- ID shows the document’s unique internal number.
- Contenu shows the document contenu, truncated to 15 words by default. You can change this with the Longueur du contenu paramètre.
- Date shows the date the document was published.
- Date de modification shows when the document was last updated.
- Tags de documents shows the étiquettes for each document, comma-separated where there is more than one.
- Statut shows the document’s état (such as draft, pending or published).
- Nombre de téléchargements shows the total number of téléchargements for each document.
Choisir vos propres en-têtes de colonne
To rename a tableau colonne en-tête, click the pencil icon for that colonne in the Bibliothèque Builder and type your preferred wording. You can change both the text and the capitalization this way.
Supprimer un en-tête de colonne
To remove a tableau colonne en-tête, open the Advanced settings for that colonne in the colonne editor and switch off the Afficher colonne en-tête toggle. This hides the label while keeping the sort arrows.
Comment masquer un champ
To hide a field, remove it from the colonne builder (tableau layout) or untick it (grille layout) in the Bibliothèque Builder. To hide a field on certain devices only, such as phones or tableauts, use the responsive visibility option instead.
Largeurs des colonnes
Définir les largeurs de colonnes
Pour remplacer les largeurs automatiques, ouvrez l’éditeur de colonnes dans le Créateur de bibliothèque, cliquez pour modifier la colonne à changer, puis définissez une largeur personnalisée dans ses réglages avancés. Vous pouvez saisir la largeur sous forme de pourcentage ou de nombre de pixels. Laisser une colonne en automatique permet à la bibliothèque de déterminer la meilleure largeur pour elle.
For example, with a titre, contenu and date colonne, you might set the titre to 20 percent, the contenu to 50 percent and the date to 30 percent. Or you could fix the first colonne at 50 pixels and leave the rest on automatic.
Problèmes courants
La largeur n’est pas appliquée
Si une largeur que vous avez définie ne prend pas effet, elle est probablement trop étroite pour contenir le contenu. Plutôt que de laisser la colonne paraître cassée, la bibliothèque l’élargit pour que tout tienne. Essayez d’augmenter la largeur de la colonne concernée.
Je veux aligner plusieurs bibliothèques
Widths are worked out for each bibliothèque on its own. If you have more than one bibliothèque on a page and want their colonnes to match, give each one the same custom widths.
My colonne widths change between pages or when I filtre
This can happen when a colonne holds a different amount of text for each document. The width is based on the documents currently shown, so it can shift when you move between pages or apply a filtre. Setting custom widths forces the colonnes to stay the same.
Longueur du contenu et de l’extrait
Longueur du contenu
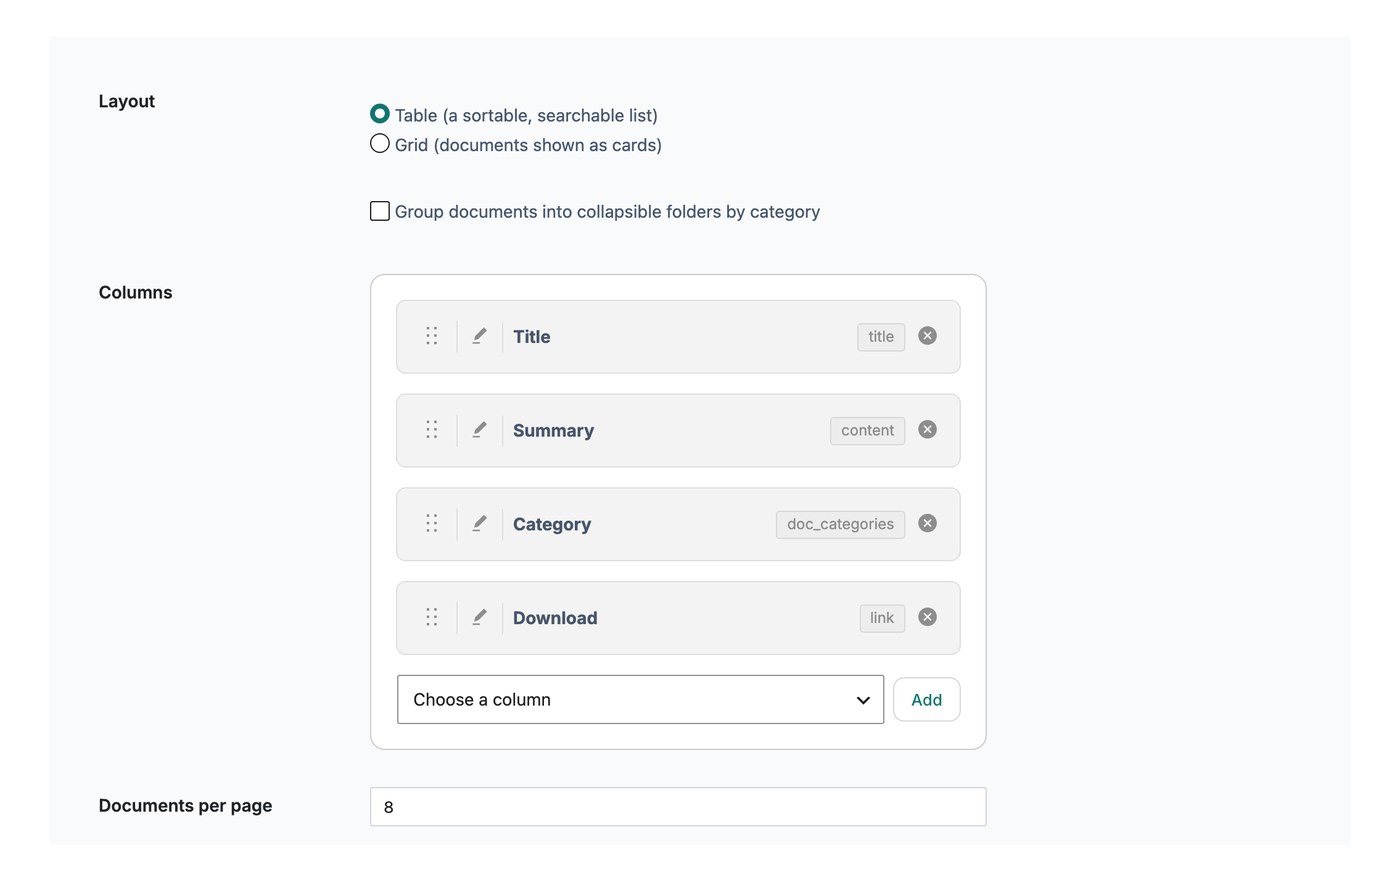
The contenu length setting controls how much of the contenu colonne is shown, if you have added that colonne to your bibliothèque. Enter the number of words you want to display. The default is 15 words. To show the full contenu with no trimming, set the value to -1.
Longueur de l'extrait
The extrait length setting controls how much of the extrait colonne is shown, if you are using it. Enter the number of words to display. For reference, the standard WordPress extrait length is 55 words.