





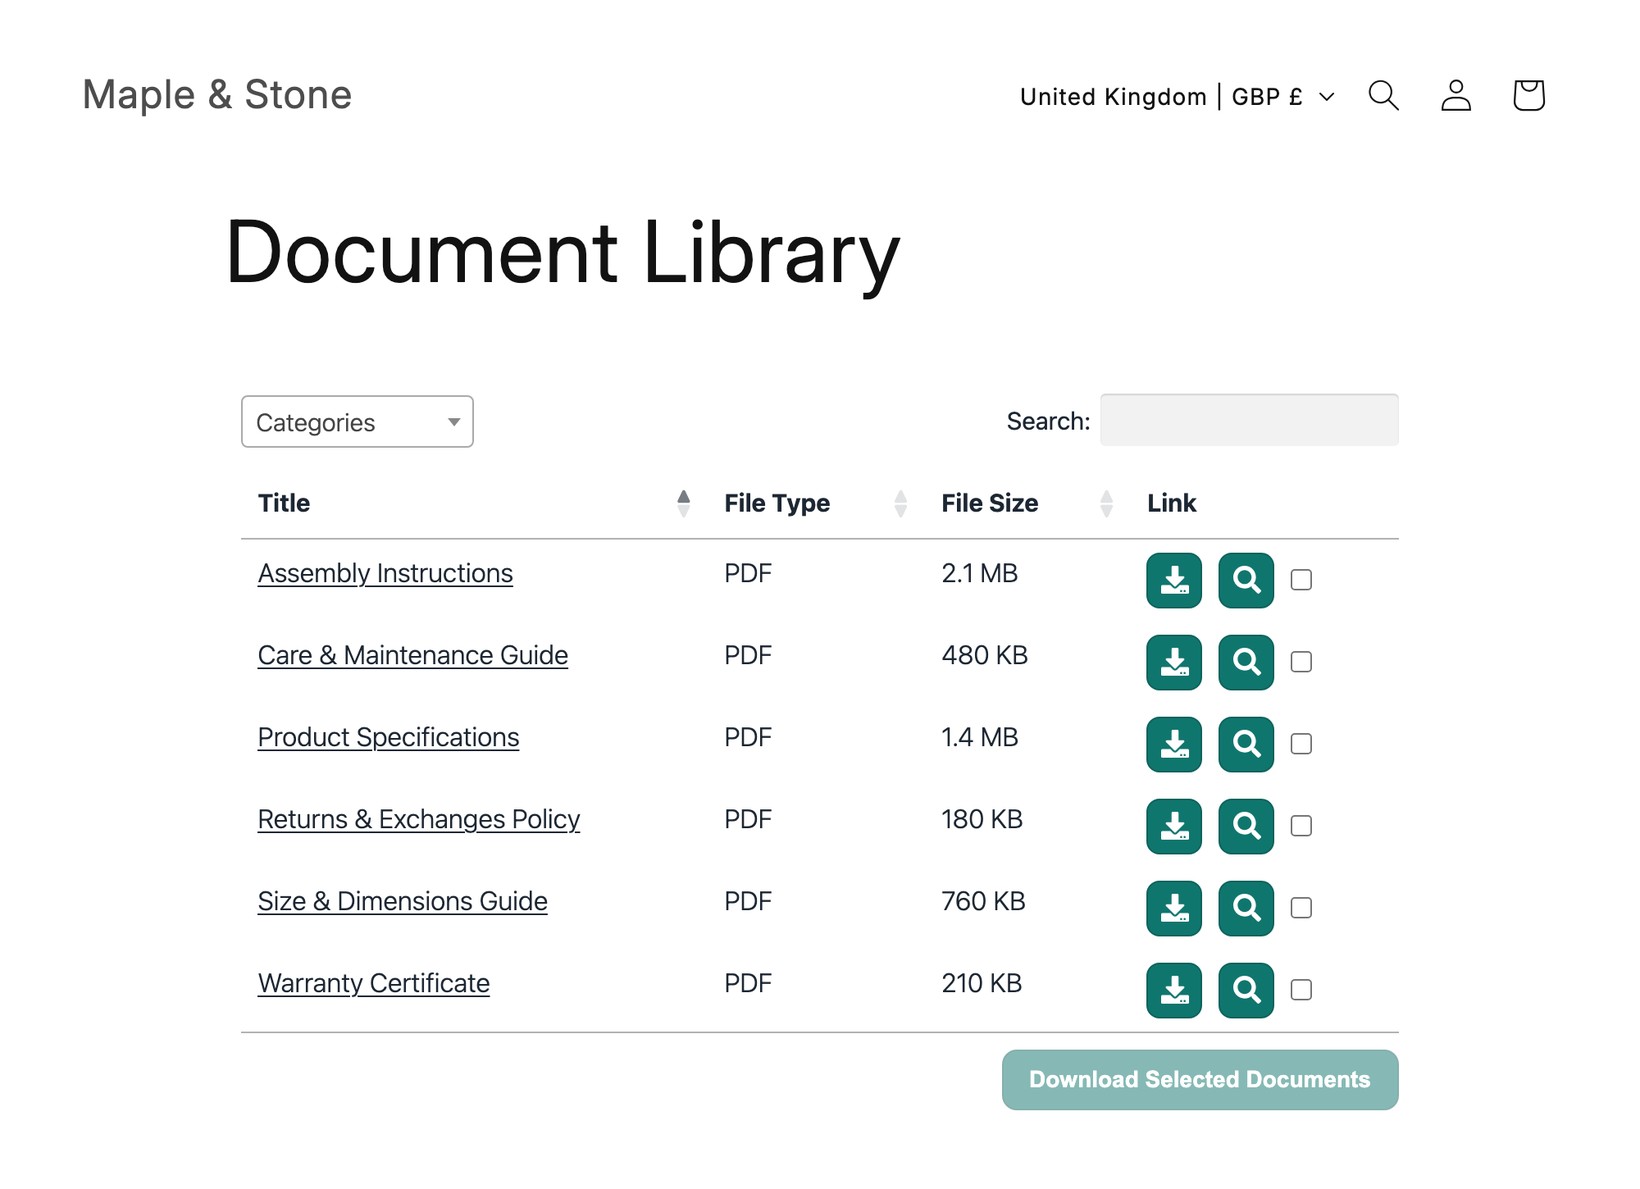
Document Library Pro is available as a Shopify app, so you can add a searchable, filterable library of documents to your store without using embed codes. The app automatically creates a main “Documents” page that lists all your documents, which you can add to your store menu, and it provides an easy way to insert document libraries into other pages and products.
Installing the app
- In the Shopify App Store, search for Document Library Pro and open its listing.
- Click Add app, then Install, and approve the permissions it asks for.
- Choose a plan to start your 14-day free trial. Your subscription is billed securely through Shopify, and you can change plan at any time. If you cancel before the end of the trial then you will not be charged.
Where you manage your library
Your documents and libraries live on the Document Library Pro platform at documentlibrary.app, and that is where you manage them. The Shopify app’s job is to connect those libraries to your store and make it easy to display them.
You do not need a separate login. Open Document Library Pro from the Apps section of your Shopify admin, and you are taken straight into your Document Library Pro account, already signed in. From there you can:
- Add and edit documents, and sort them into categories, tags and authors.
- Create extra libraries that list a specific set of documents, for example the documents for one product.
- Change your library’s appearance and settings, such as its columns, search and filters.
So whenever you need to change your documents or your library, open the app from the Apps menu and make your changes on the platform. For a full walkthrough, see adding documents to your library and building a library with the Library Builder. The rest of this article covers every way to display a library on your store.
You can also create additional libraries, each listing a different set of documents, and insert them into specific pages, products, and your theme templates. This guide covers every option.
Note: The first three options on this page only work when you’re using the Document Library Pro Shopify app. If you bought Document Library Pro directly on this website without installing the Shopify app, then you can only use the embed code method.
Add your Documents page to your store menu
The app creates a ready-made page called Documents that lists all of your documents. To add a link to it in your store navigation:
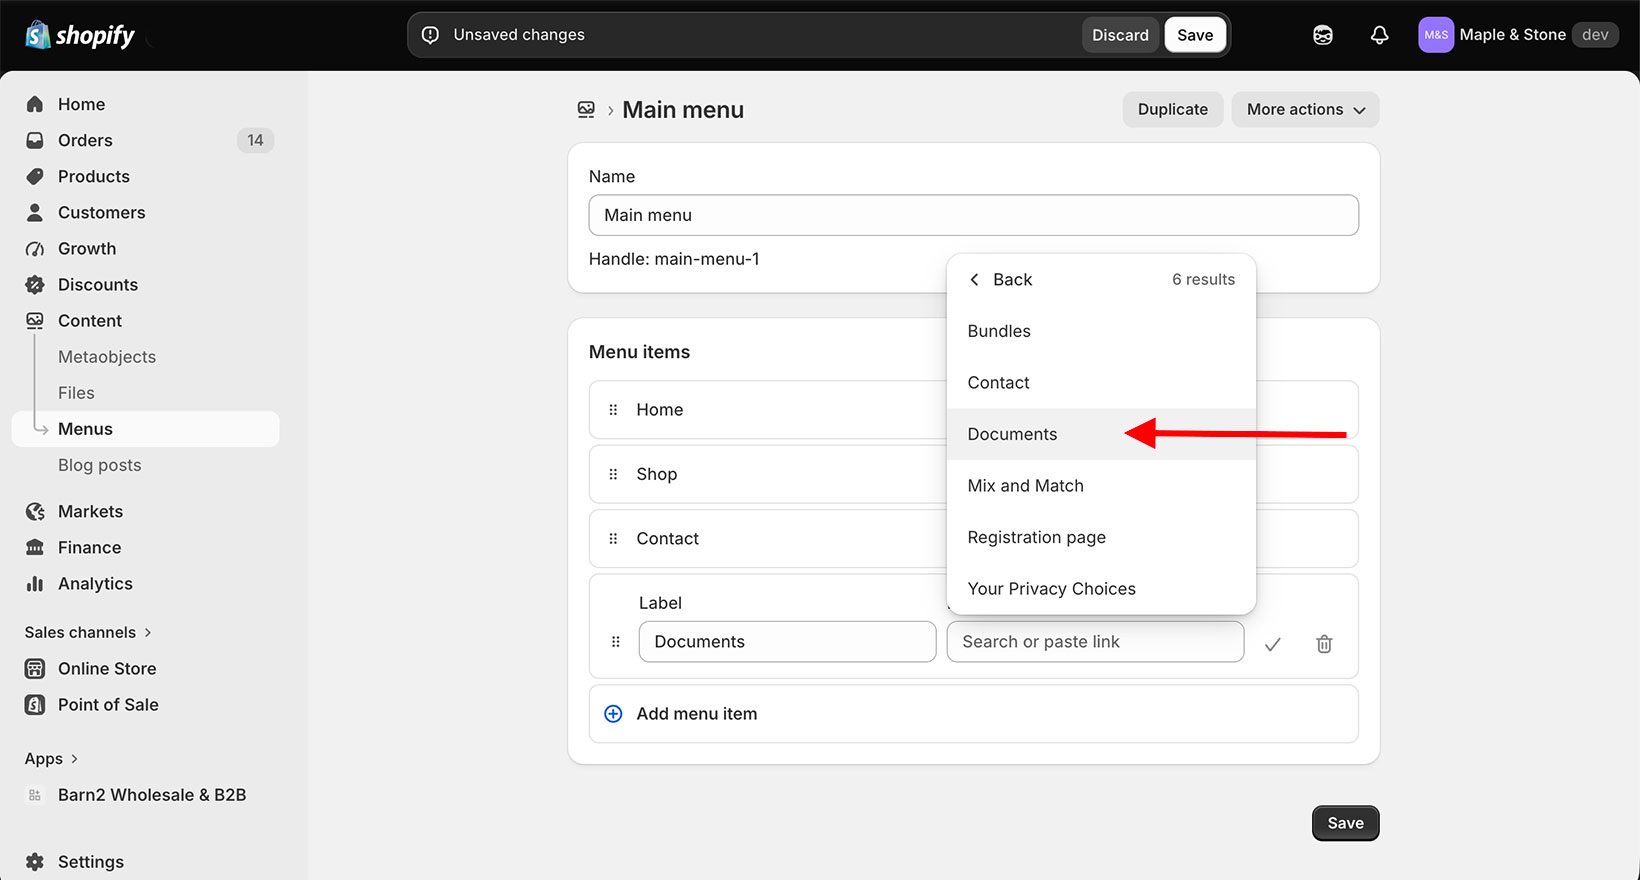
- In your Shopify admin, go to Content → Menus.
- Open the menu you want (for example, your main menu) and click Add menu item.
- In the Link field, search for and select the Documents page.
- Give it a name such as “Documents” and click Save menu.
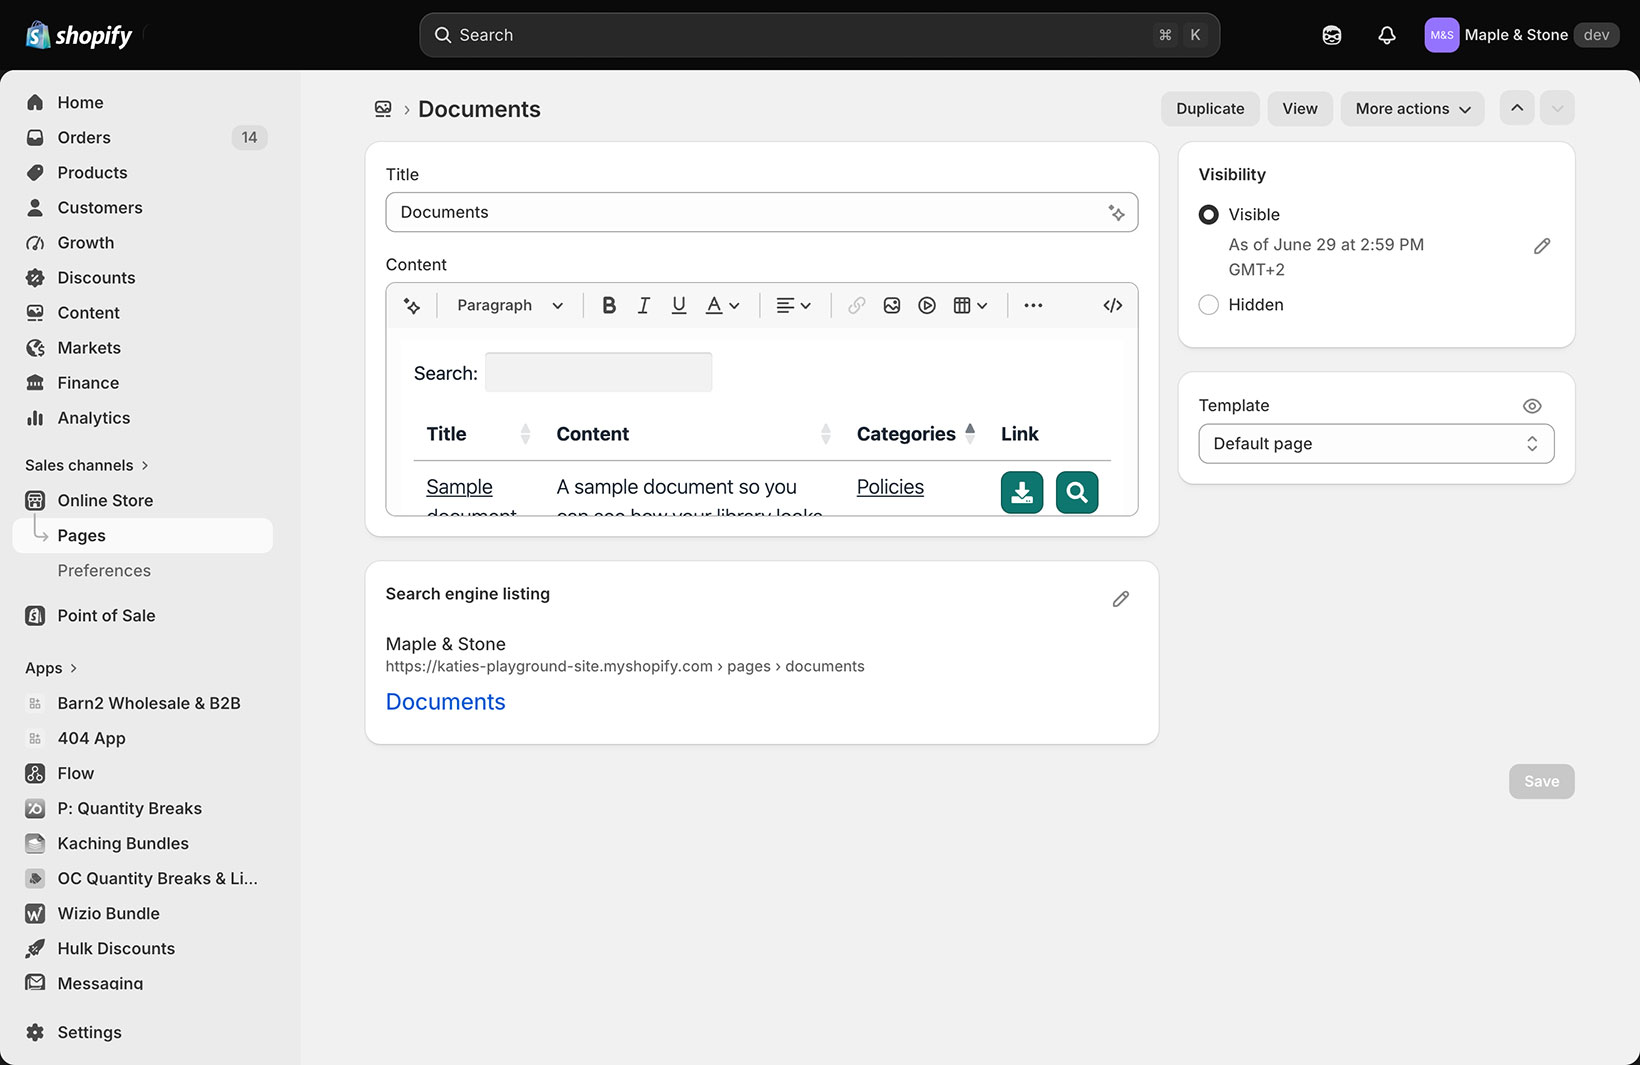
The Documents page is a normal Shopify page, so you have full control over it. Under Online Store → Pages you can rename it, and add your own text and images above or below the library, for example a short introduction. If you only want to show documents on specific products and do not need a central library page, you can simply delete the Documents page.
Creating additional libraries
As well as your main Documents page, you can create additional libraries, each listing a different set of documents on its own library page. Do this via the Libraries section of the Document Library Pro admin.
For example, you might want multiple libraries in order to list different documents on different product pages, or to show different libraries on different parts of your store. Once you have created your extra libraries, use the methods below to add them to the relevant parts of your store.
Add a library to a product
To add a library to a product:
- Open the product you want to add a library to.
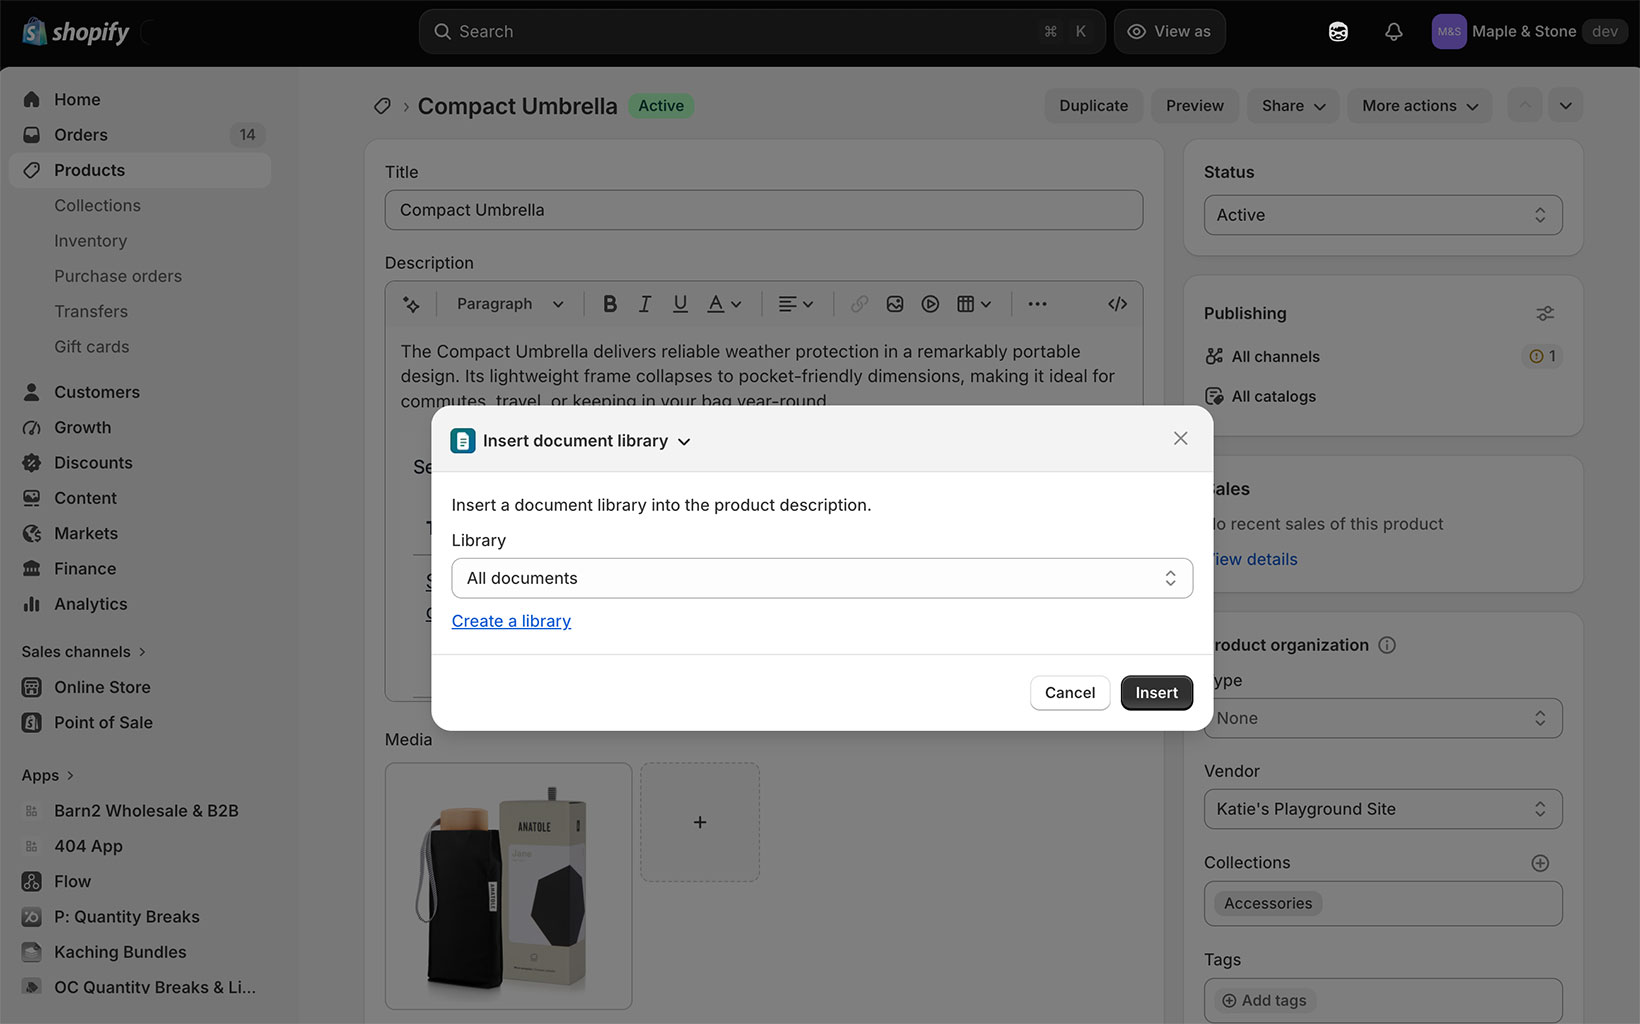
- Click More actions at the top right, then Insert document library.
- Choose which library to add, then click Insert.
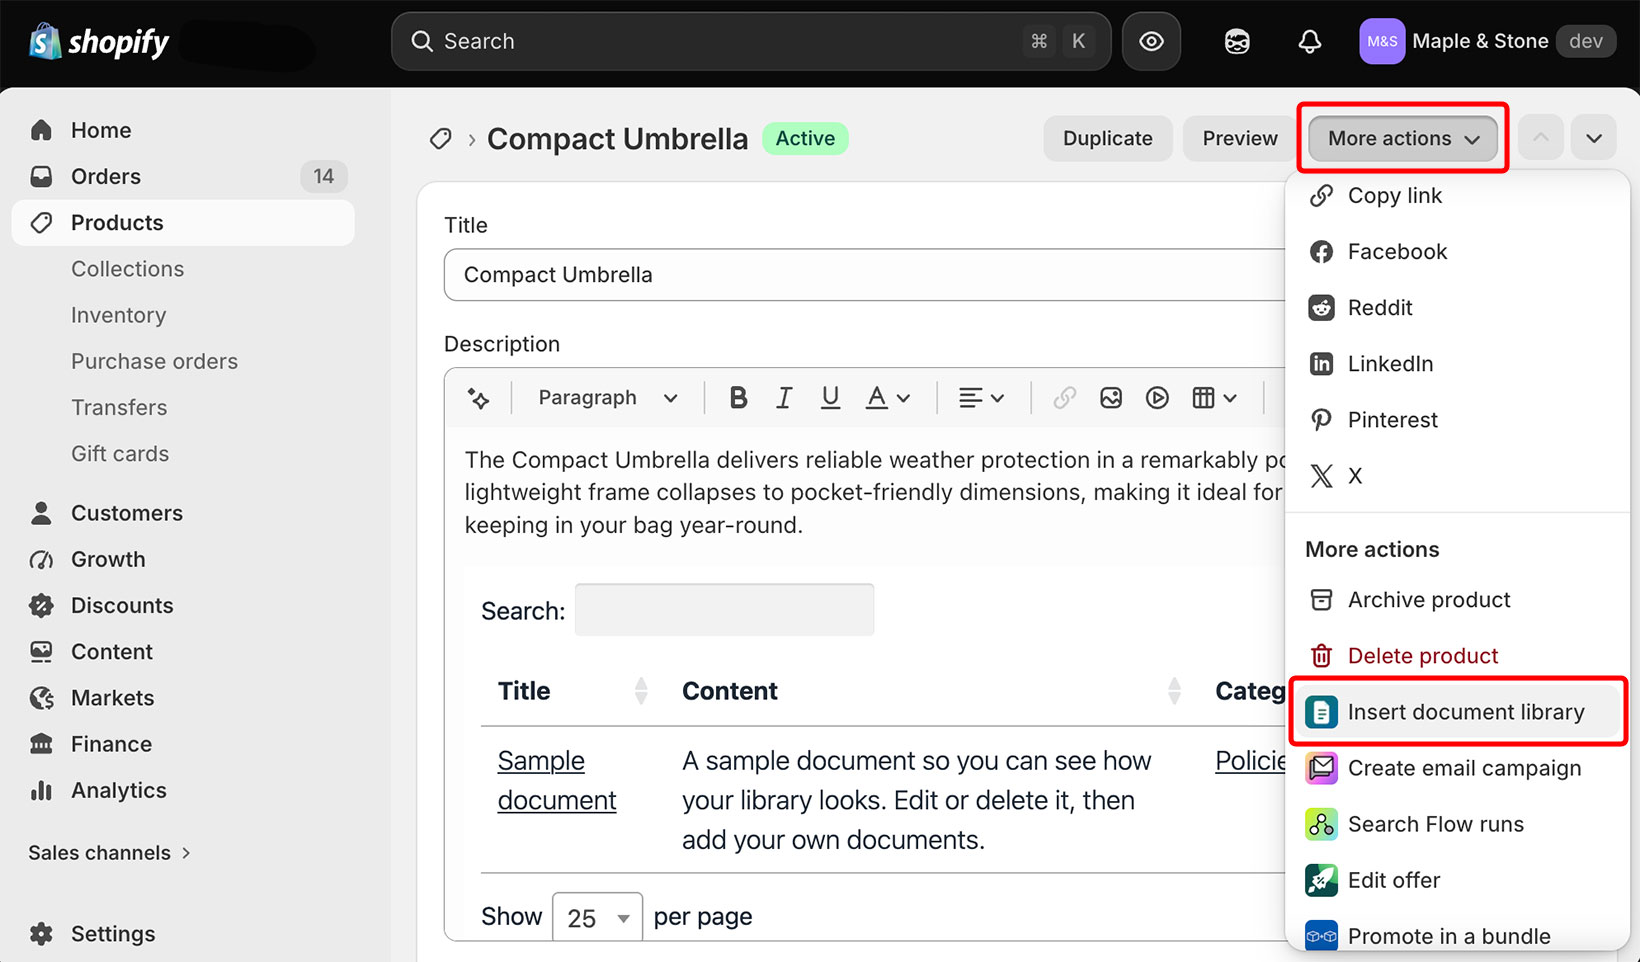
The library is added to the product description and appears on your storefront straight away. There is nothing else to switch on.
Adding a library to a page? Use the embed code method below.
Which library is added: By default, this inserts a library that lists all of your documents. If you have created additional libraries, those also appear in the list for you to choose from.
Show a different library on each product
You can show a different library on every product. Insert the library you want on each product using the steps above. For example, you could create a separate library of spec sheets for each product and insert the matching one on each product page.
Moving the library within the description
The library is always added at the end of the description. To move it somewhere else:
- In the description editor, click the code view button (<>) in the toolbar.
- Find the
<iframe>...</iframe>block, which is at the very end of the code. - Cut it and paste it where you want the library to appear among your other content, then save.
Adding the Document library card
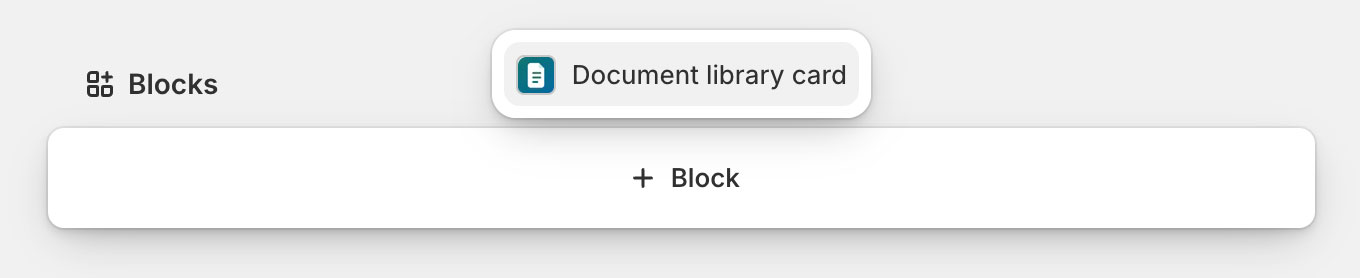
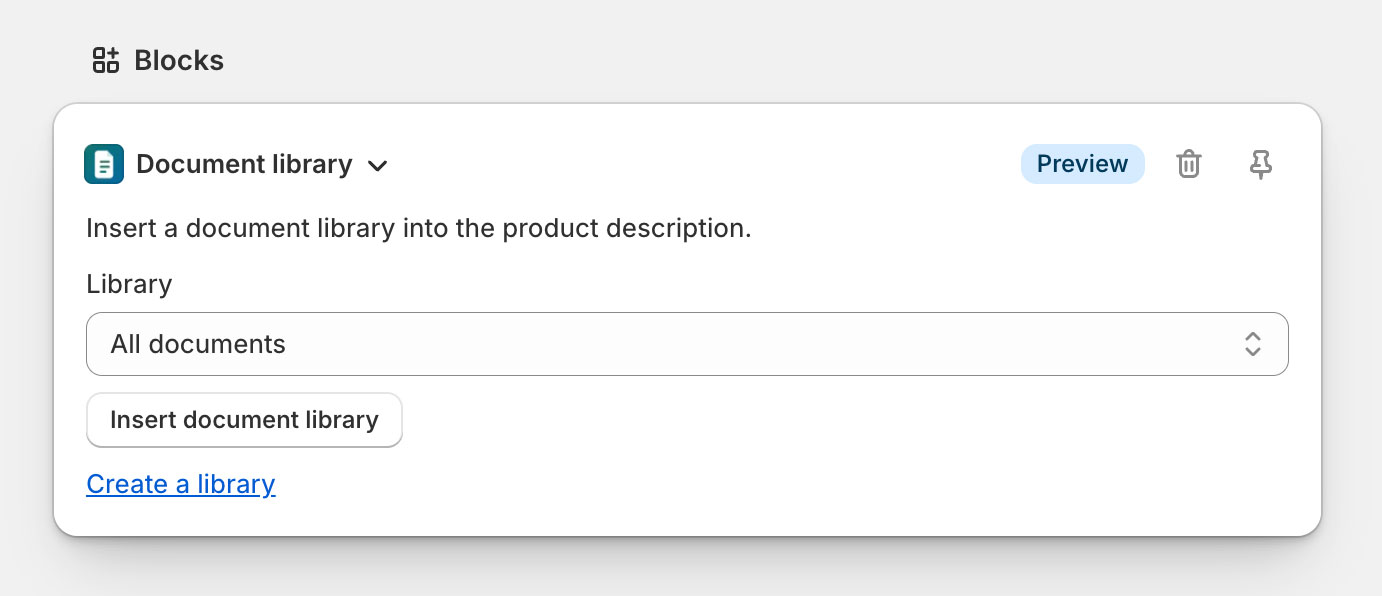
To add document libraries to products more easily, you can also add a Document library card to the product editing screen itself, so you do not have to open the More actions menu each time. We recommend pinning it (the pin icon on the card) so it appears on the editing screen of every product, not just one. The card appears in the Blocks section toward the bottom of the editing screen, and Shopify keeps app cards there, so it cannot be moved higher up the page.
Scroll to the Blocks section at the bottom of a product, click Add block, choose Document library card, then pin it.
Add a library to a theme template
If you want to add a document library to a fixed spot in your theme rather than inside a product or page description (for example below the Add to cart button), you can add it as a theme block:
- Go to Online Store → Themes and click Customize.
- Open the template you want (such as the product template), click Add block in the section where you want the library, and choose the Document Library block.
- It lists all of your documents by default. To show a specific library instead, pick one from the Library dropdown, then save.
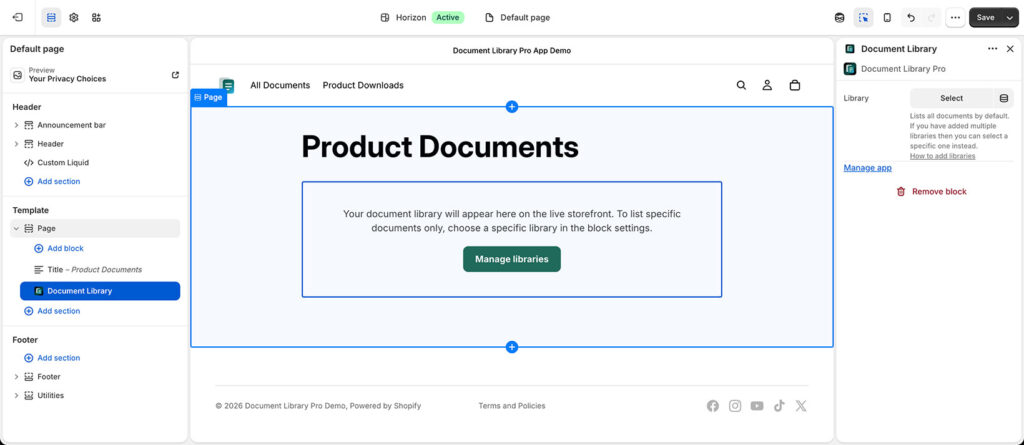
Because a theme block is placed on the template, it shows the same library on every product or page that uses that template. To show a different library on each product, use the insert method above, which adds the library to that one product only.
Use an embed code to add libraries anywhere
Every library has an embed code (an <iframe>). You can paste it anywhere you can add HTML. This is the method to use if you use Document Library Pro without the Shopify app, or if you want to place a library somewhere the steps above do not cover.
To get your embed code, first open the Publish Library page in your Document Library Pro dashboard and copy the embed code for the relevant library. (If you haven’t yet created the library you wish to embed, then you can do so on the Libraries page.)
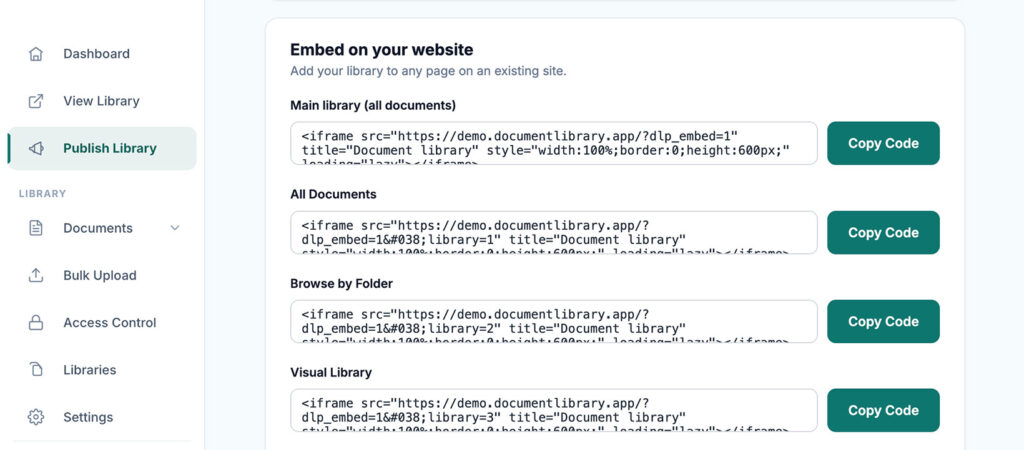
Next, Paste the embed code into any of the following:
- A product description: Open the product, click the code view button (<>) in the description toolbar, and paste the embed code where you want it.
- A page: Go to Online Store → Pages, open or create a page, click the code view button (<>) in the content toolbar, and paste the embed code.
- A theme section: In Online Store → Themes → Customize, add a Custom Liquid block to a section and paste the embed code into it.
- Any other website: The same embed code works on any website, not just Shopify.
If the embed code looks like it has vanished
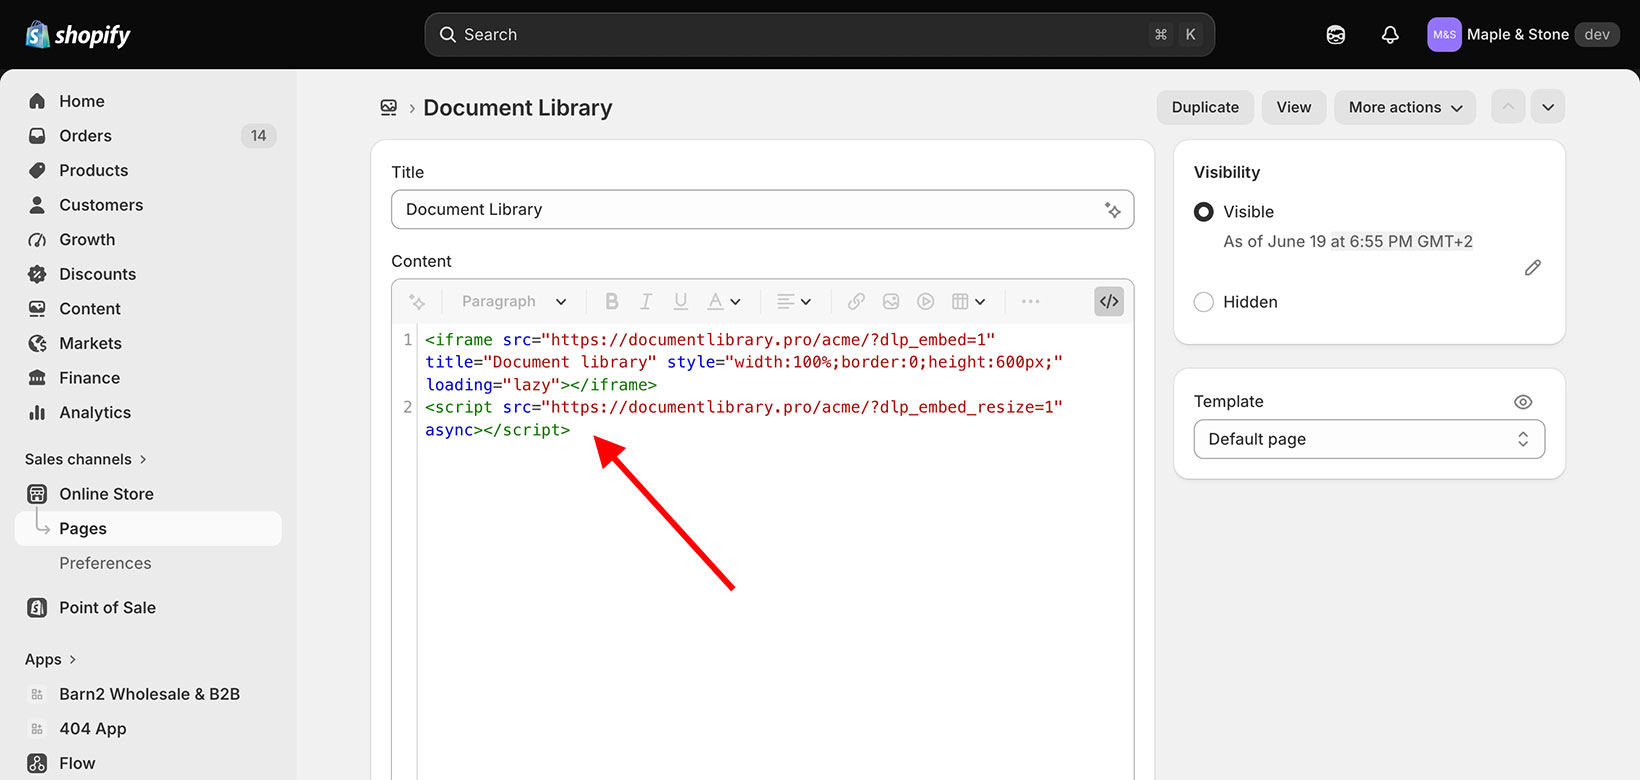
After you paste the embed code into Shopify, the library may look like it has disappeared. It has not vanished. Shopify’s page and product description editors do not render an embedded library in the visual tab, so the area can look empty even though the code saved fine.
Make sure you paste the embed code through the code view button, shown as <> in the editor toolbar. Typing or pasting it into the visual tab does not work. After saving, view the page on your live storefront to see the library.
Our embed code has two parts: An <iframe>, and a small script under it that lets the library resize itself to fit its content. Shopify’s editor keeps the <iframe> and removes the script. This means the library stays at the height set on the <iframe> instead of growing to fit. You can edit the height value in the style attribute, for example height:600px, to suit your library.
If you want the library to size itself, use one of the app’s own options covered earlier on this page: The ready-made Documents page, the Insert document library option on a product, or the Document Library theme block.