Google Sites has a built-in Embed tool that lets you show your hosted document library on any page. Here is how to set it up from start to finish.
Before you begin: every embed in Google Sites is given a fixed size, so you will need to resize the box around your library (covered in Step 5). The library shows up both in Preview and on your published site.
Step 1: Copy your embed code
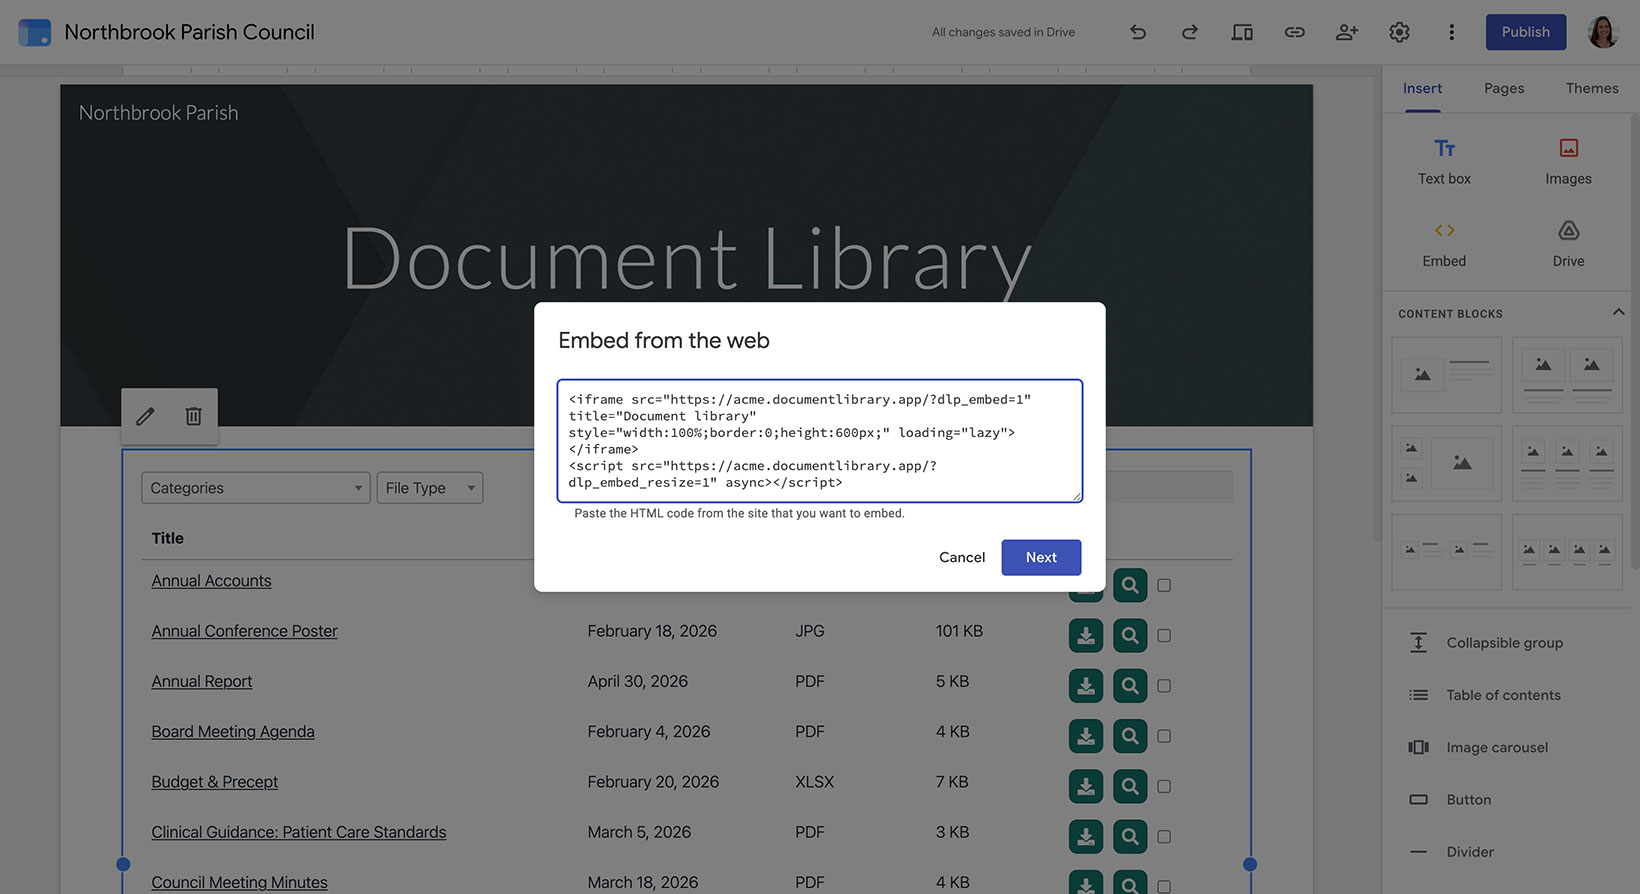
Log in to your hosted dashboard, open the Libraries screen, and click Copy code next to the library you would like to display. The snippet looks like the example below, but always use the code from your own dashboard rather than this one:
<iframe src="https://your-library.documentlibrary.app/?dlp_embed=1" title="Document library" style="width:100%;border:0;height:600px;" loading="lazy"></iframe>
<script src="https://your-library.documentlibrary.app/?dlp_embed_resize=1" async></script>
Step 2: Create a page for your library
In the Google Sites editor, switch to the Pages tab and add a new page, or reuse one you already have. Name it something like Document Library. Google Sites will add it to your navigation menu for you.
Step 3: Open the Embed tool
While on your page, open the Insert panel and click Embed. When the dialog opens, switch to the Embed code tab.
Step 4: Paste your embed code
Drop the embed code from Step 1 into the box, then click Next followed by Insert.
Step 5: Resize the embed to fit your library
Do not skip this part. Because Google Sites assigns the embed a fixed size, drag its handles so the box ends up both wider and taller than your library. That way the entire table fits without getting cut off and has a little space to spare. Switch to Desktop view as well, so the library has enough room to show all of its columns.
Step 6: Publish and view your library
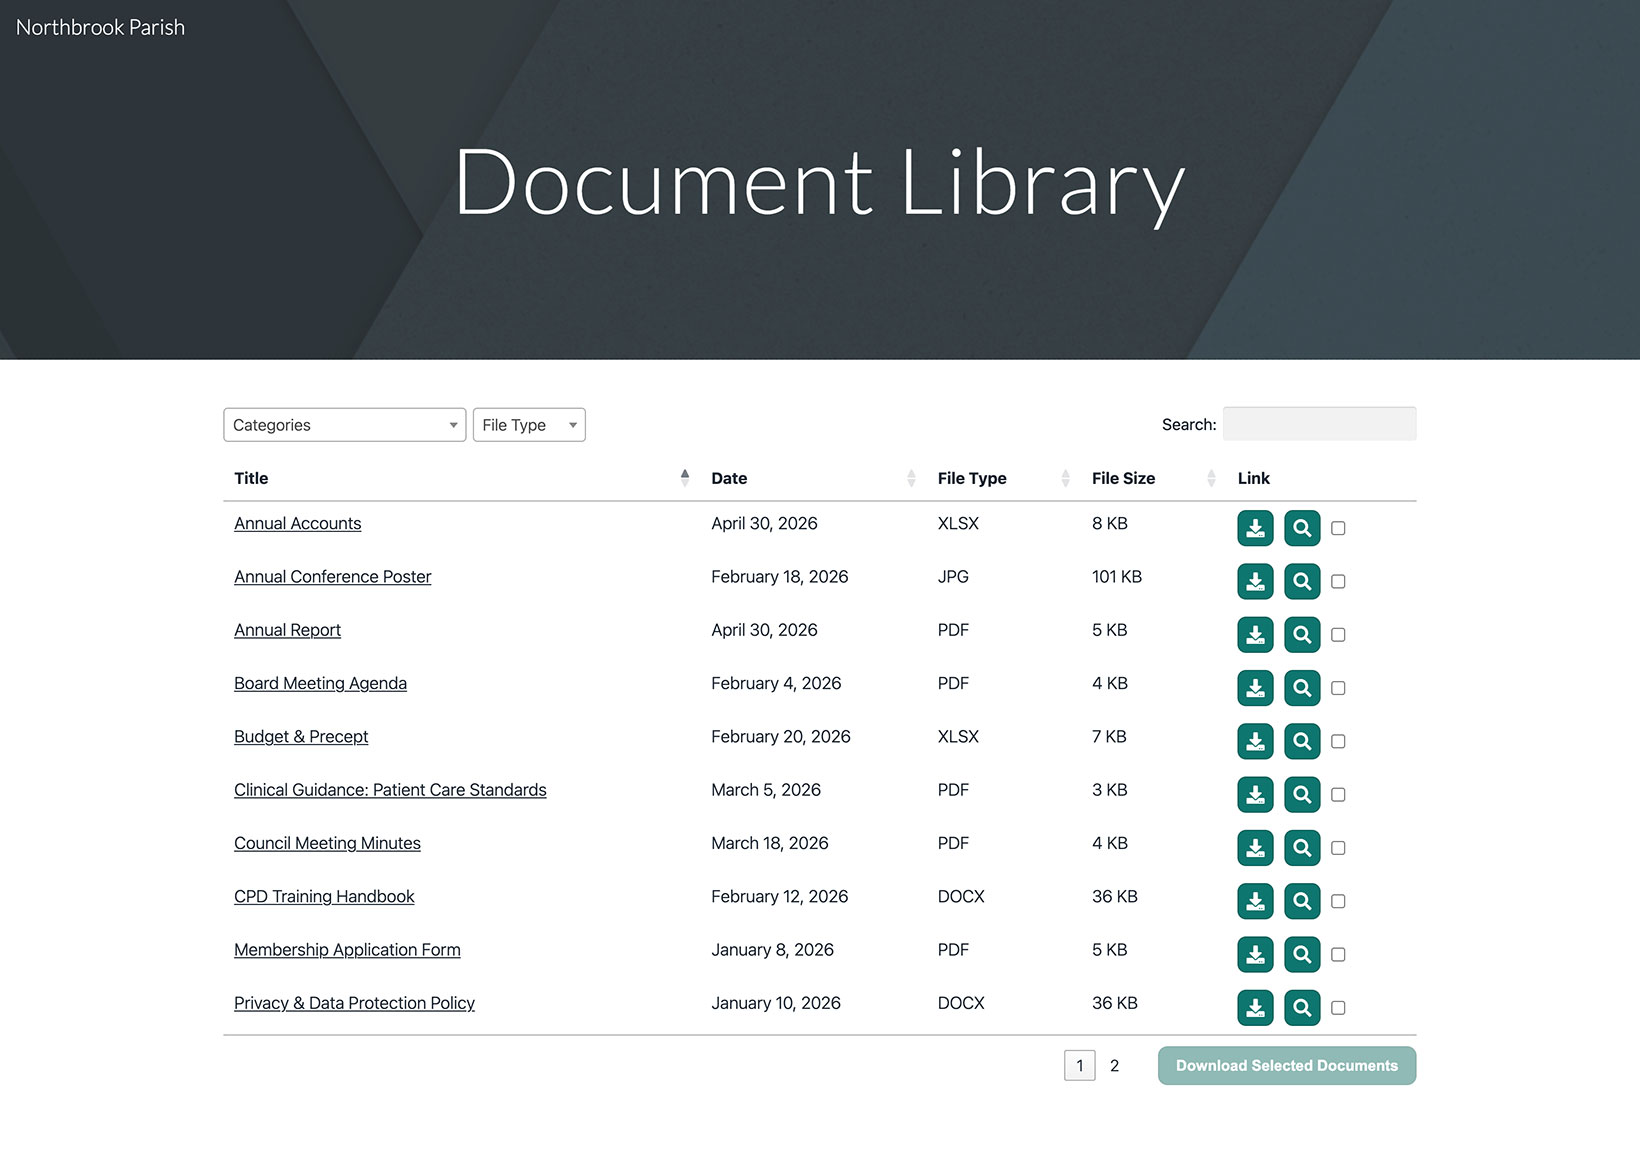
Click Publish in the top right, or use Preview if you want to check it first. Once it is live, open the page to find your document library there, where visitors can search it, filter by category, and download or preview any document.