





Avec le module Rich text intégré d’HubSpot, vous pouvez placer votre bibliothèque de documents hébergée sur n'importe quelle page HubSpot. Les étapes ci-dessous couvrent tout le processus.
Avant de commencer : Cela fonctionne avec tous les forfaits HubSpot, y compris le forfait gratuit. Vous n'avez pas besoin d'une mise à niveau payante ni d'un module personnalisé. HubSpot ajoute la bibliothèque avec une largeur fixe étroite, ce qui demande une étape supplémentaire pour l'élargir plus loin dans l'article. L'éditeur HubSpot peut aussi ne pas afficher le résultat final, alors vérifiez la page publiée.
Copiez votre code d'intégration
Dans votre tableau de bord Document Library Pro hébergé, ouvrez Publier la bibliothèque et copiez le code d'intégration de votre bibliothèque. Si vous avez créé plusieurs bibliothèques, ouvrez l'écran Bibliothèques et copiez le code de la bibliothèque spécifique que vous voulez ajouter à HubSpot.
Utilisez votre propre code d'intégration, pas cet exemple :
<iframe src="https://your-library.documentlibrary.app/?dlp_embed=1" title="Document library" style="display:block;width:100%;border:0;height:600px;" loading="lazy"></iframe>
<script src="https://your-library.documentlibrary.app/?dlp_embed_resize=1" async></script>
Forfaits HubSpot gratuits et Starter
Les forfaits HubSpot gratuits et Starter ne vous permettent pas de créer vos propres modules. Vous utilisez donc le module intégré Rich text Il existe deux façons de le faire, et les deux fonctionnent de la même manière.
Méthode 1 : Insérer l'intégration
- Ouvrez la page HubSpot où vous voulez afficher la bibliothèque de documents.
- Faites glisser un module Rich text sur la page, ou cliquez sur un module Rich text déjà présent.
- Cliquez sur Insérer dans la barre d'outils.
- Choisissez Intégrer.
- Collez votre code d'intégration Document Library Pro.
- Cliquez sur Insérer.
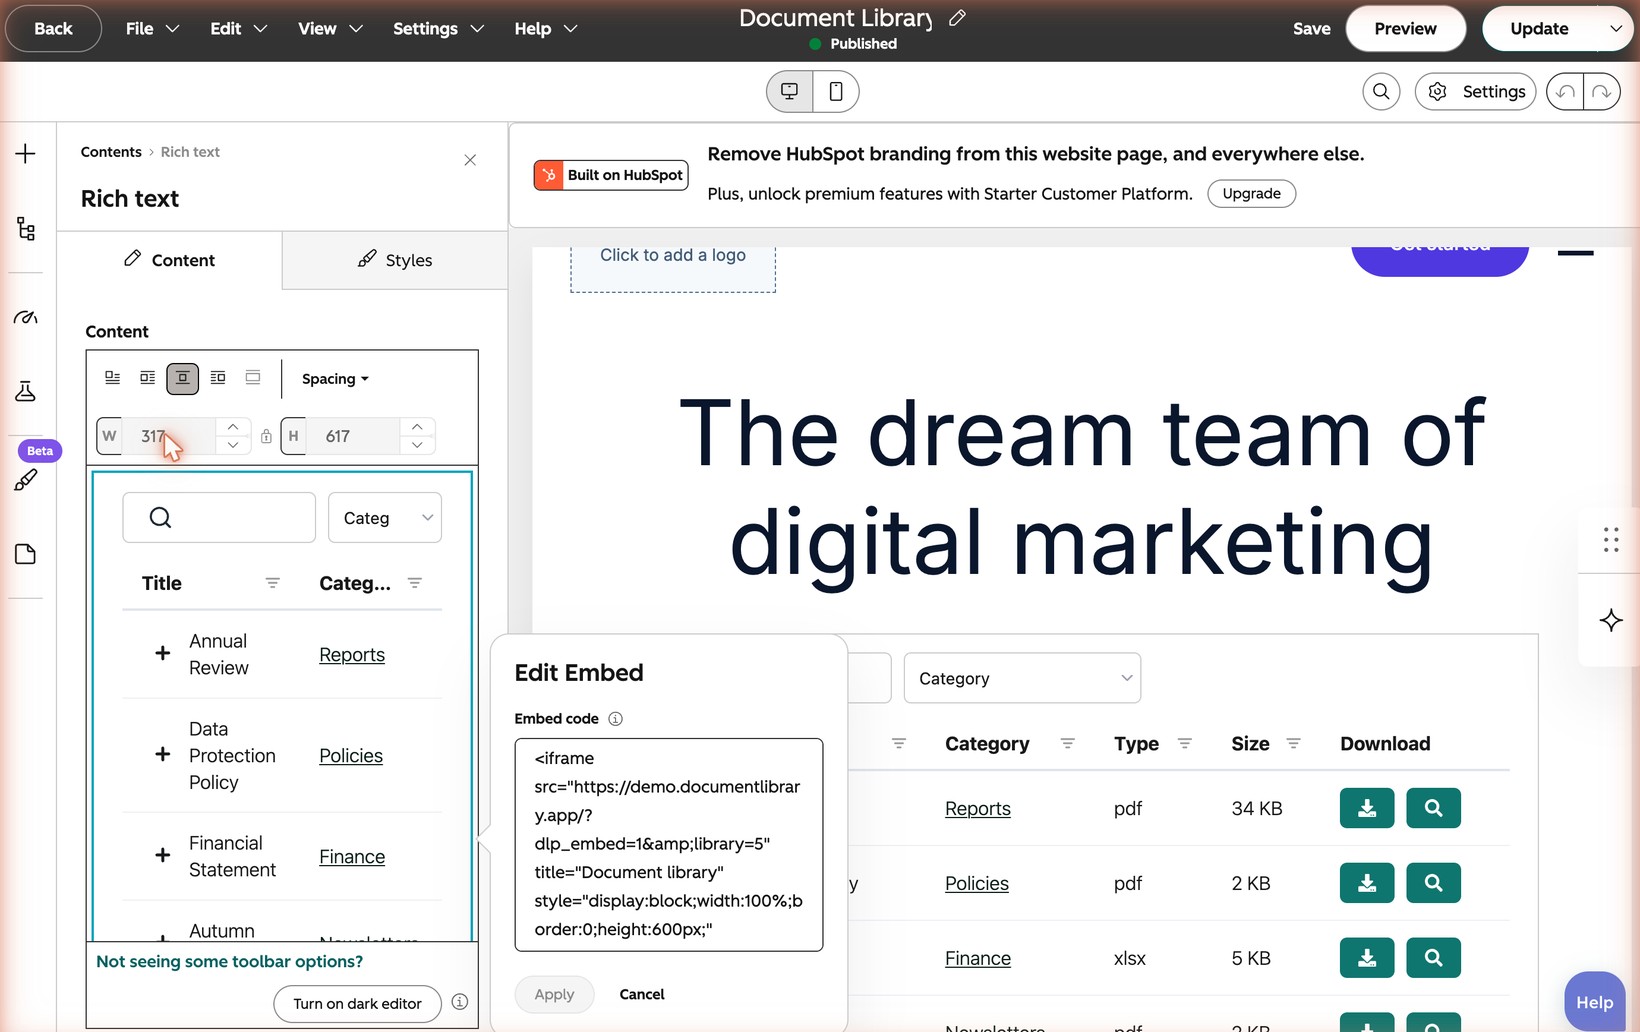
Avec le forfait gratuit, il n'y a pas de module Intégrer séparé dans la liste des modules. Rich text est le bon chemin.
Méthode 2 : Coller dans le code source
- Ouvrez la page HubSpot où vous voulez afficher la bibliothèque de documents.
- Faites glisser un module Rich text sur la page, ou cliquez sur un module Rich text déjà présent.
- Cliquez sur Avancé.
- Choisissez Code source.
- Collez votre code d'intégration Document Library Pro.
- Cliquez sur Enregistrer les modifications.
Cette méthode vous convient si vous êtes à l'aise avec HTML. C'est aussi là que vous reviendrez plus tard si vous devez modifier la largeur de la bibliothèque.
Forfaits HubSpot Professional et Enterprise
Les deux méthodes ci-dessus fonctionnent aussi avec les forfaits HubSpot Professional et Enterprise, et ce sont les plus rapides. Ces forfaits débloquent aussi le gestionnaire de design. Un développeur peut donc envelopper le code d'intégration dans un module personnalisé si votre équipe veut le réutiliser sur de nombreuses pages. C'est facultatif et nécessite quelqu'un à l'aise avec les modèles HubSpot.
Donner la bonne largeur à la bibliothèque
Lorsque vous insérez la bibliothèque, HubSpot estime la largeur à utiliser. Il choisit quelque chose d'étroit, généralement 317 pixels. Résultat, la bibliothèque de documents est comprimée dans une colonne fine.
HubSpot dispose d'un bouton Pleine largeur qui corrigerait normalement cela. Il ne fonctionne pas pour la bibliothèque de documents, car la bibliothèque inclut un petit script. HubSpot grise le bouton.
Ce même bouton grisé verrouille aussi les champs de largeur et de hauteur. Vous ne pouvez pas non plus saisir une largeur à cet endroit.
La seule façon de définir la largeur est donc de passer par le code source :
- Cliquez sur le Rich text module qui contient votre bibliothèque de documents.
- Cliquez sur Avancé.
- Choisissez Code source.
- Trouvez max-width: 317px.
- Remplacez 317 par la largeur souhaitée en pixels. 1100 est un bon point de départ pour la plupart des pages.
- Cliquez sur Enregistrer les modifications.
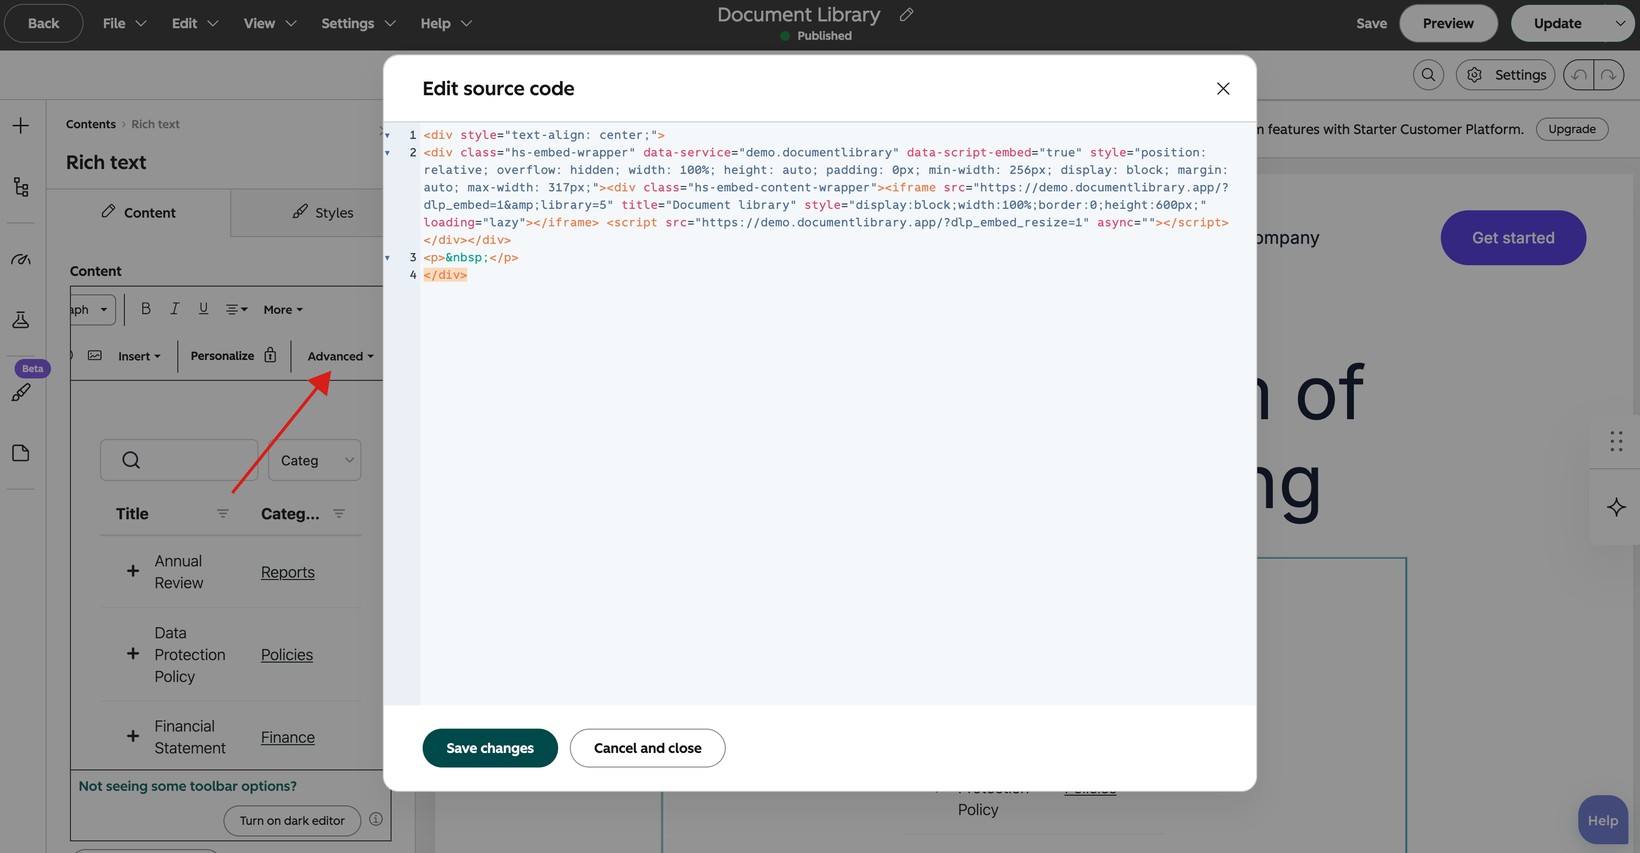
La bibliothèque continue de se réduire pour s'adapter aux petits écrans et aux téléphones. Le nombre que vous saisissez est une largeur maximale, pas une largeur fixe.
Publiez et vérifiez la page
Cliquez sur Publier, ou Mettre à jour si la page est déjà en ligne.
La bibliothèque se redimensionne automatiquement selon son contenu. Cela signifie que la page HubSpot grandit et rétrécit lorsque les visiteurs passent d'une page de documents à l'autre.
L'éditeur HubSpot n'affiche pas toujours le résultat final. Vérifiez la page publiée après avoir enregistré la modification.
Si la bibliothèque n'apparaît pas
D'abord, vérifiez que vous avez collé les deux lignes du code d'intégration. La deuxième ligne permet à la bibliothèque de se redimensionner automatiquement.
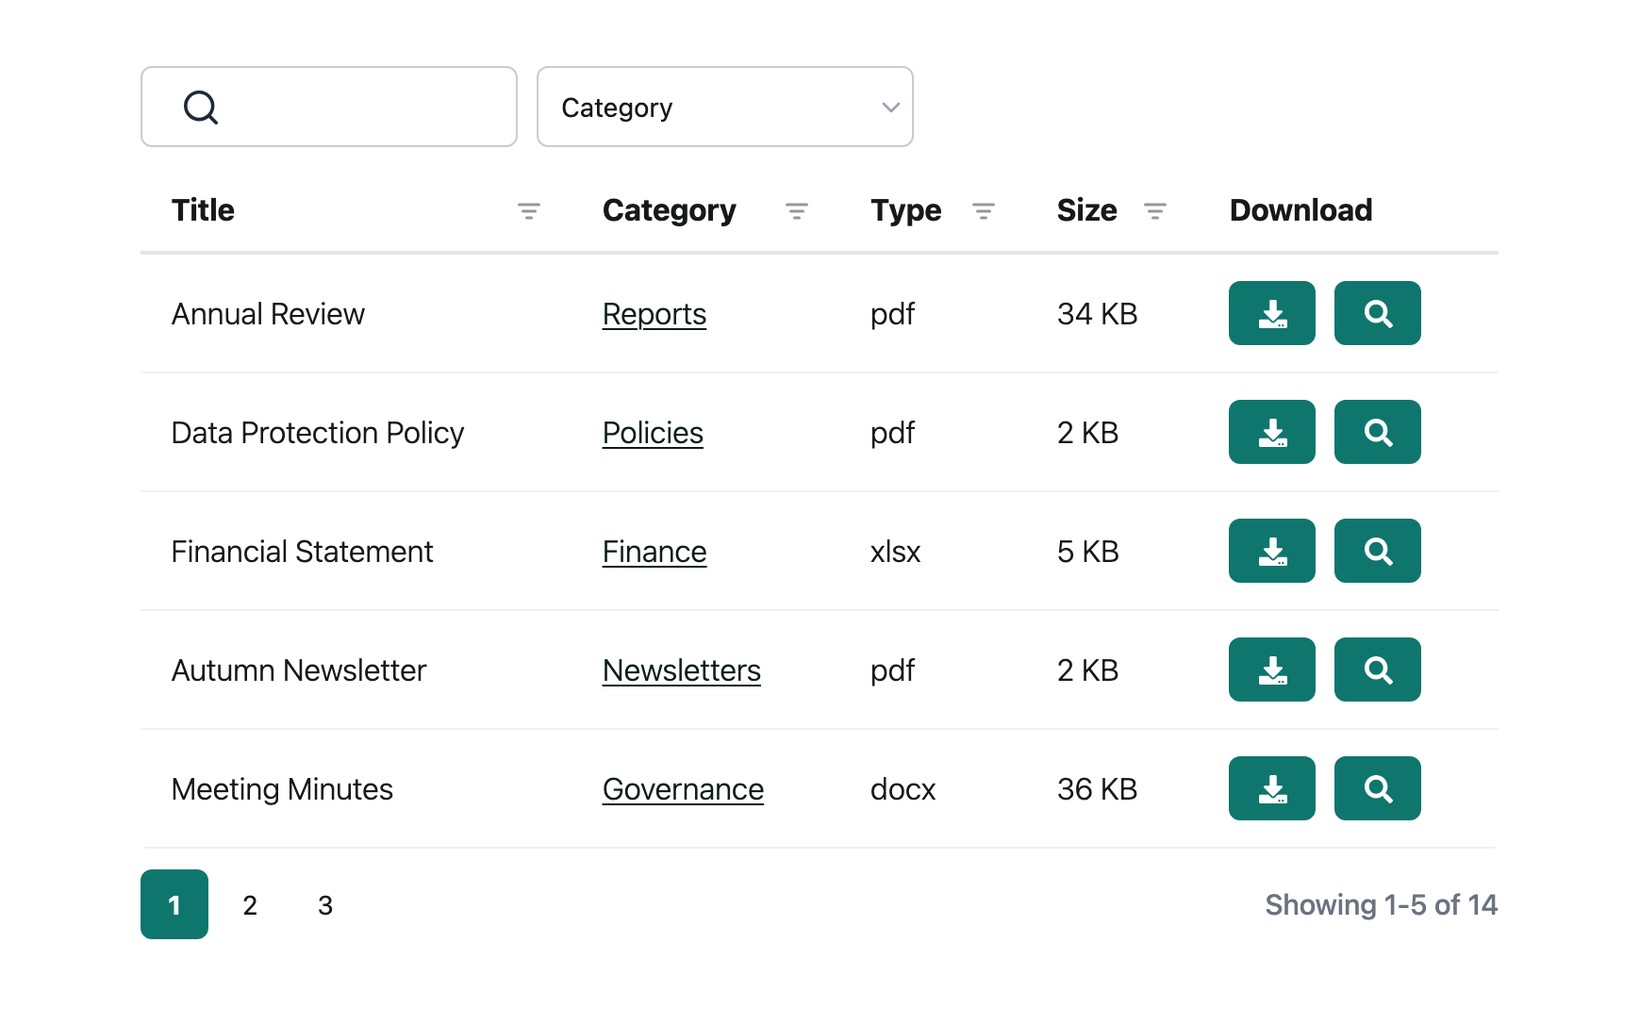
Ensuite, vérifiez la page publiée au lieu de vous fier à l'aperçu de l'éditeur. La page en ligne est l'endroit où confirmer que la bibliothèque de documents s'affiche correctement.