


Document Library Pro lets you add a searchable, filterable library of documents to your Shopify store: inside a product, on a page, or as its own page in your store menu. This guide covers every way to do it, whether or not you are using the Document Library Pro Shopify app.
Insert a library into a product or page
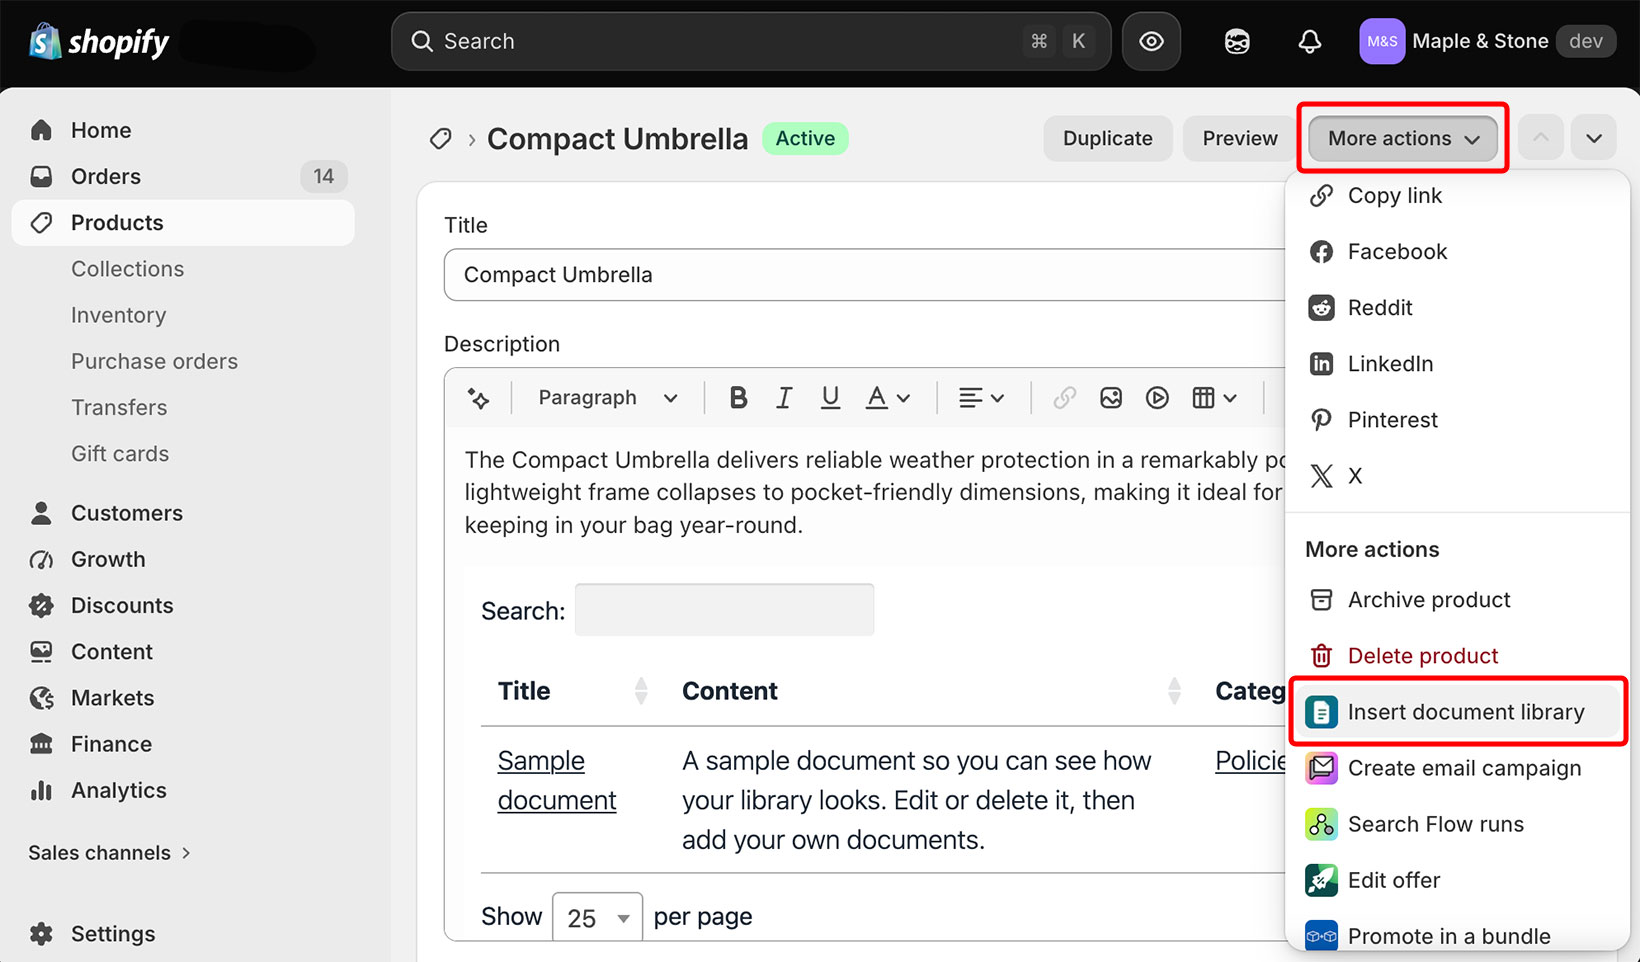
If you installed Document Library Pro from the Shopify App Store, you can add a library to any product or page in a couple of clicks.
- Open the product or page you want to add a library to.
- Click More actions at the top right, then Insert document library.
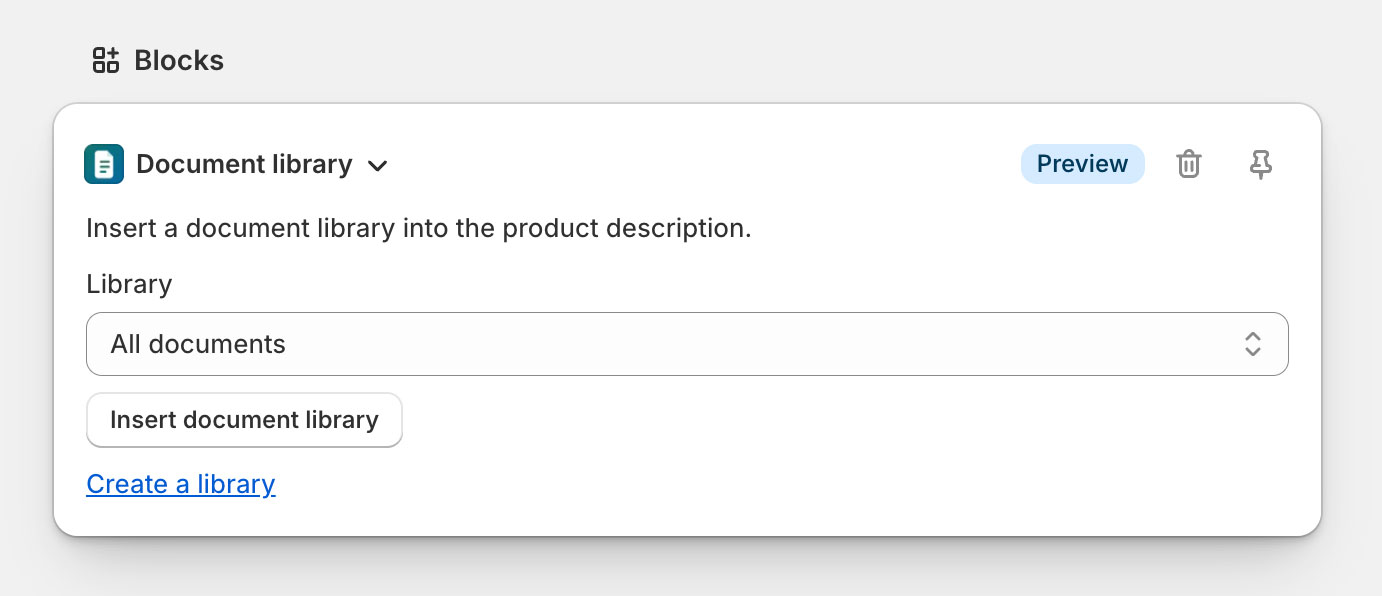
- Choose which library to add (see below), then click Insert.
The library is added to the product or page description and appears on your storefront straight away. There is nothing else to switch on.
Which library is added: by default, this inserts a library that lists all of your documents. If you have created additional libraries that list a specific set of documents, those also appear in the list for you to choose from. To build a new library, click Create a library in the picker, which opens the Document Library Pro platform where you create it.

Moving the library within the description
The library is always added at the end of the description. To move it somewhere else:
- In the description editor, click the code view button (<>) in the toolbar.
- Find the
<iframe>...</iframe>block, which is at the very end of the code. - Cut it and paste it where you want the library to appear among your other content, then save.
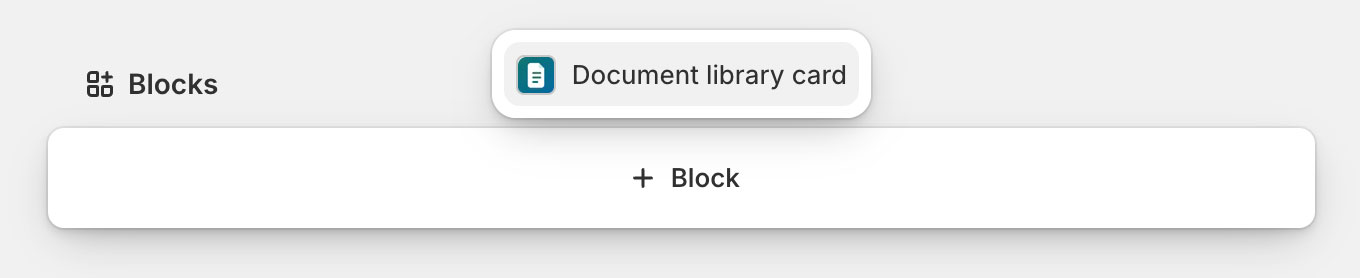
Adding the Document library card
To add document libraries to products more easily, you can also add a Document library card to the product editing screen itself, so you do not have to open the More actions menu each time. We recommend pinning it (the pin icon on the card) so it appears on the editing screen of every product, not just one. The card appears in the Blocks section toward the bottom of the editing screen, and Shopify keeps app cards there, so it cannot be moved higher up the page.
Scroll to the Blocks section at the bottom of a product or page, click Add block, choose Document library card, then pin it.
Showing a different library on each product
You can show a different library on every product. Insert the library you want on each product using the steps above. For example, you could create a separate library of spec sheets for each product and insert the matching one on each product page.
Adding your whole library to your store menu
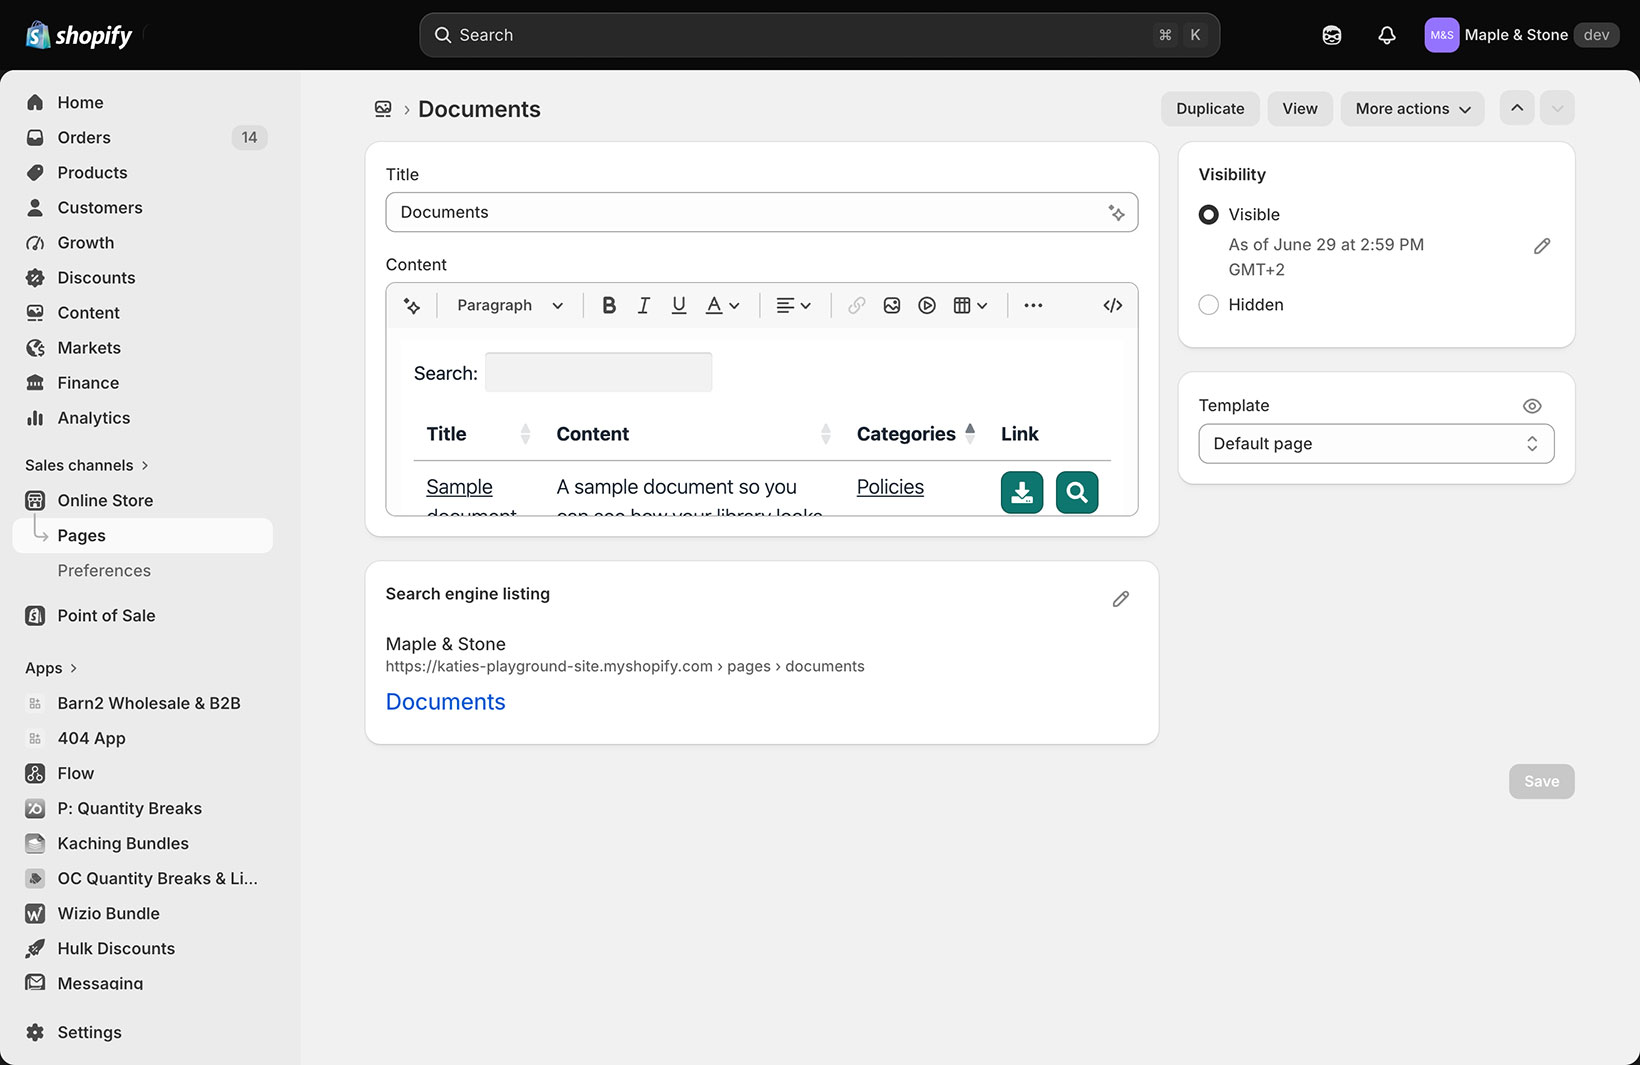
The app creates a ready-made page called Documents that lists all of your documents. To add a link to it in your store navigation:
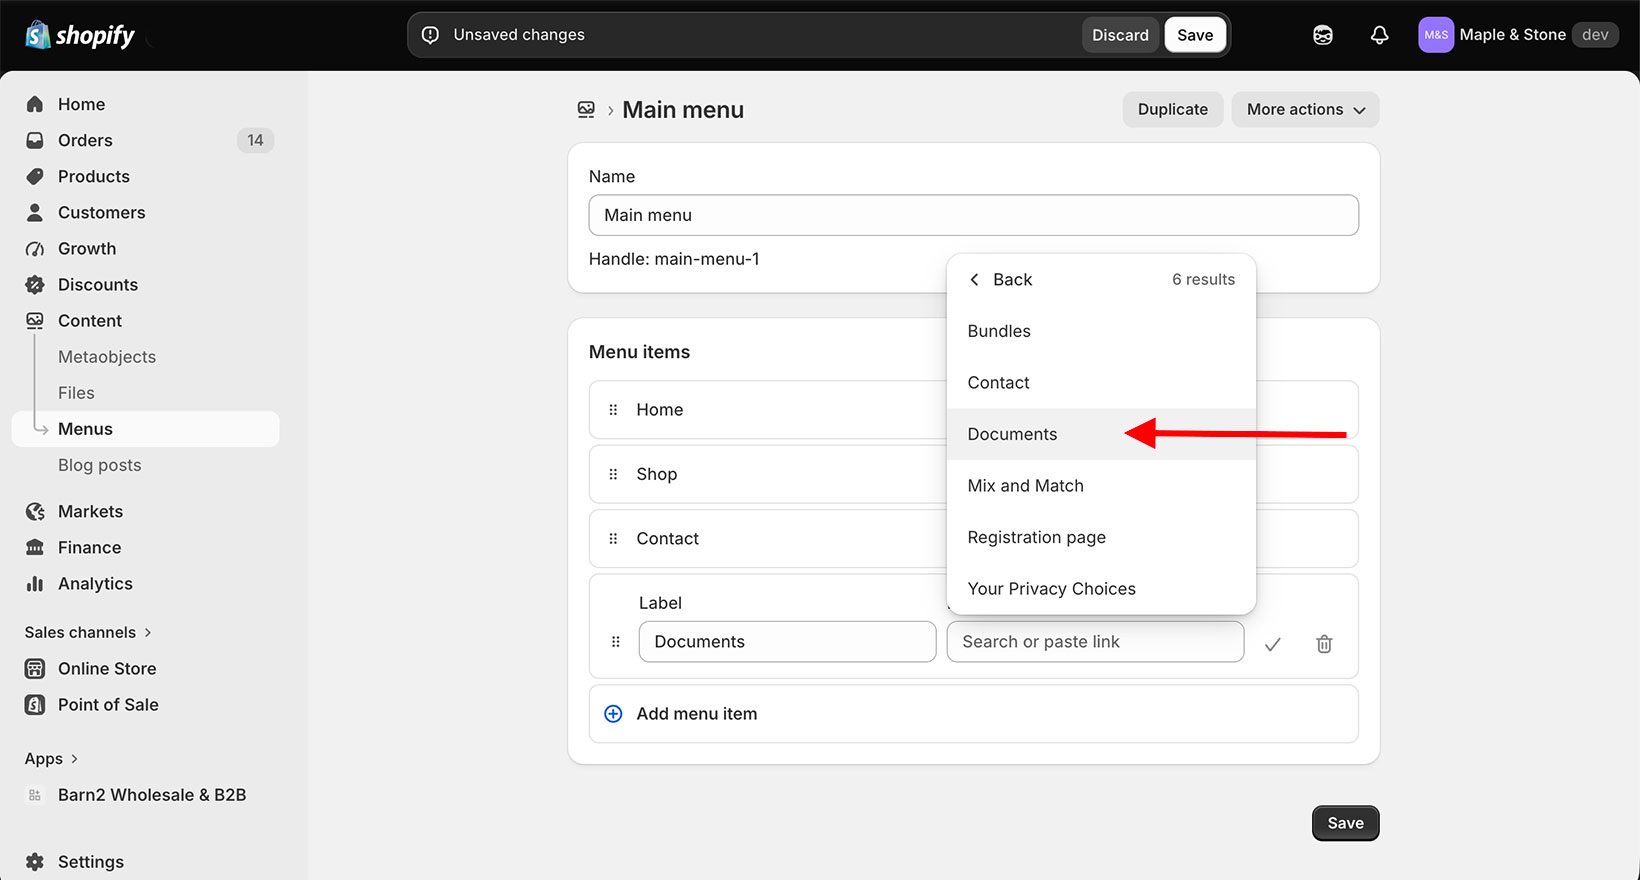
- In your Shopify admin, go to Content → Menus.
- Open the menu you want (for example, your main menu) and click Add menu item.
- In the Link field, search for and select the Documents .
- Give it a name such as “Documents” and click Save menu.
The Documents page is a normal Shopify page, so you have full control over it. Under Online Store → Pages you can rename it, and add your own text and images above or below the library, for example a short introduction. If you only want to show documents on specific products and do not need a central library page, you can simply delete the Documents page.
Adding a document library to a theme section
If you want a library to appear in a fixed spot in your theme rather than inside a product or page description (for example below the Add to cart button), you can add it as a theme block.
- Go to Online Store → Themes and click Customize.
- Open the template you want (such as the product template), click Add block in the section where you want the library, and choose the Document Library block.
- Enter the slug of the library you want to show, then save.
Because a theme block is placed on the template, it shows the same library on every product or page that uses that template. So this method is best for a single shared library. To show a different library on each product, use the insert method above, which adds the library to that one product only.
If you are comfortable with theme code and want a different library per product in a fixed theme position, you can add a Shopify Custom Liquid block that reads a product metafield, then set that metafield (the library slug) on each product. This is an advanced setup and is not required for the methods above.
Adding a document library with the embed code
Every library has an embed code (an <iframe>). You can paste it anywhere you can add HTML. This is the method to use if you signed up at documentlibrary.pro without the Shopify app, or if you want to place a library somewhere the steps above do not cover. To get your embed code, open Publier la bibliothèque in your Document Library Pro dashboard and copy it.
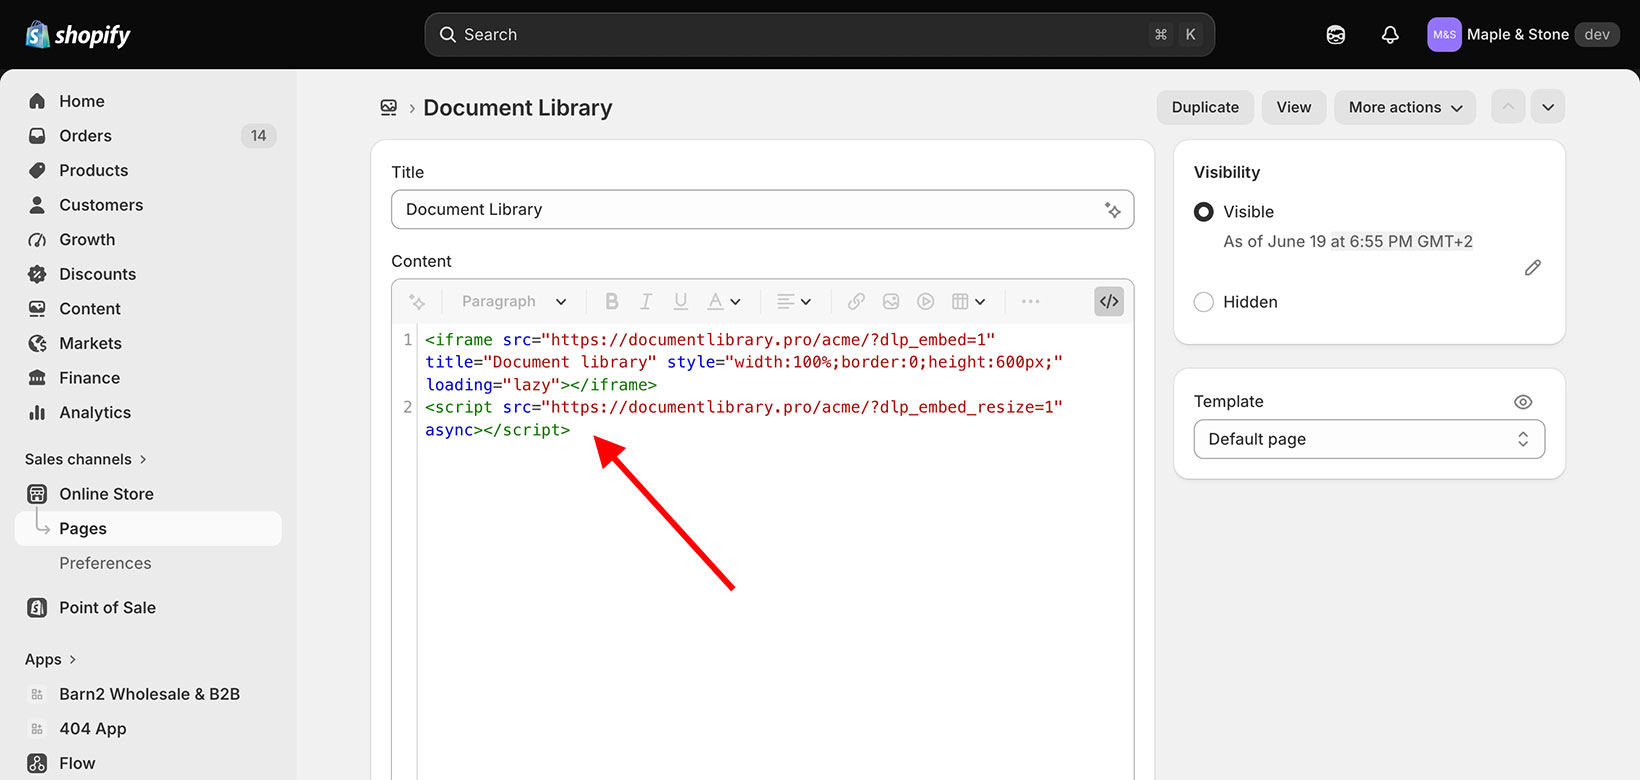
You can paste the embed code into:
- A product description: open the product, click the code view button (<>) in the description toolbar, and paste the embed code where you want it.
- A page: go to Online Store → Pages, open or create a page, click the code view button (<>) in the content toolbar, and paste the embed code.
- A theme section: in Online Store → Themes → Customize, add a Custom Liquid block to a section and paste the embed code into it.
- Any other website: the same embed code works on any website, not just Shopify.